Kel Fab Creations Bronco Build
-
Kel Fab Creations

- Posts: 727
- Joined: Wed Nov 23, 2011 2:01 pm
- Bronco Info: 95 Bronco
- Location: San Jacinto, Ca
- Contact:
Re: Kel Fab Creations Bronco Build
Sorry, I wasn't trying to say you were bashing. I'm just used to threads on DR where somebody starts talking crap about an easily fixable body line off so they say they will never buy that glass again blah blah blah. I just didn't want everyone to think I was starting something like that.
Kelly @ Kel Fab Creations
-
bajascott
- My belly is my best friend
- Posts: 2006
- Joined: Mon Dec 07, 2009 11:29 pm
- Bronco Info: its black, its fun to drive,and i dont have enough money to build it the way i want to!:)
- Location: southern oregon
- Contact:
Re: Kel Fab Creations Bronco Build
we dont take kindly to DR type bashing around here so dont worry about it...
back to thread keep on truckin on!!
back to thread keep on truckin on!!
-
philofab
- Basura Blanca
- Posts: 5643
- Joined: Tue Dec 08, 2009 9:37 am
- Bronco Info: A pile of crap.
- Location: Bullhead, AZ
- Contact:
Re: Kel Fab Creations Bronco Build
I used u-nuts on my quarters... allows for the fender to be moved around a little for fitment. My Autofab glass didn't fit perfect around my tail light either... but I think John mentioned that it was made for the earlier (80s) Bronco rear.
I think on your glass I would just trim the back off off and do a little fiberglass work to match it up.
I think on your glass I would just trim the back off off and do a little fiberglass work to match it up.
Follow me on Instagram. @philofab1 or Youtube https://www.youtube.com/philofab/
-
ChaseTruck754

- Spy/Ninja
- Posts: 9194
- Joined: Thu Jan 28, 2010 9:46 am
- Bronco Info: Don't have one - just old Ford trucks
- Location: Huntington Beach, CA
Re: Kel Fab Creations Bronco Build
I was bashing. But then again I'm the a-hole that does that and I really dislike the quality of 90% of the off road glass I've seen. I know much better can be done. I've done it and so has John.
Owner of only dead and forgotten projects
-
Kel Fab Creations
- Posts: 727
- Joined: Wed Nov 23, 2011 2:01 pm
- Bronco Info: 95 Bronco
- Location: San Jacinto, Ca
- Contact:
Re: Kel Fab Creations Bronco Build
Man, why didn't I think of those u nuts. That would have been easier. I'll probably do the fiberglass reshaping after I get all the new suspension under it.philofab wrote:I used u-nuts on my quarters... allows for the fender to be moved around a little for fitment. My Autofab glass didn't fit perfect around my tail light either... but I think John mentioned that it was made for the earlier (80s) Bronco rear.
I think on your glass I would just trim the back off off and do a little fiberglass work to match it up.
Kelly @ Kel Fab Creations
-
Kel Fab Creations
- Posts: 727
- Joined: Wed Nov 23, 2011 2:01 pm
- Bronco Info: 95 Bronco
- Location: San Jacinto, Ca
- Contact:
Re: Kel Fab Creations Bronco Build
Haha. I have heard that autofab's glass is top notch but I prefer the flat top, wrap around, and tapered rear of the fiberwerks.ChaseTruck754 wrote:I was bashing. But then again I'm the a-hole that does that and I really dislike the quality of 90% of the off road glass I've seen. I know much better can be done. I've done it and so has John.
Kelly @ Kel Fab Creations
-
Pre Run It
- Posts: 203
- Joined: Sat Feb 04, 2012 12:53 am
- Bronco Info: 93' 5.8 glass F & B 2.5 pro series FOX with Res, Caged, bfg projects beadlocks currie
- Location: Temecula, Ca
Re: Kel Fab Creations Bronco Build
Bronco is looking good. I know someone who is getting seats next week....
-
Kel Fab Creations
- Posts: 727
- Joined: Wed Nov 23, 2011 2:01 pm
- Bronco Info: 95 Bronco
- Location: San Jacinto, Ca
- Contact:
-
Kel Fab Creations
- Posts: 727
- Joined: Wed Nov 23, 2011 2:01 pm
- Bronco Info: 95 Bronco
- Location: San Jacinto, Ca
- Contact:
Re: Kel Fab Creations Bronco Build
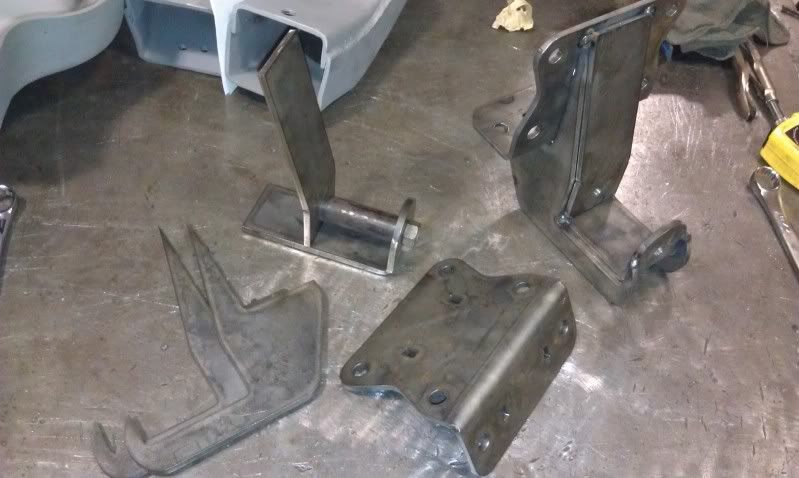
Got alot done this last week...
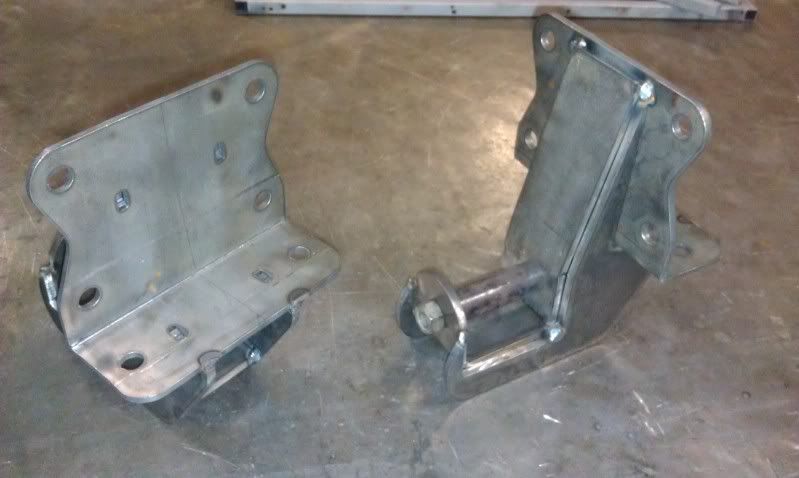
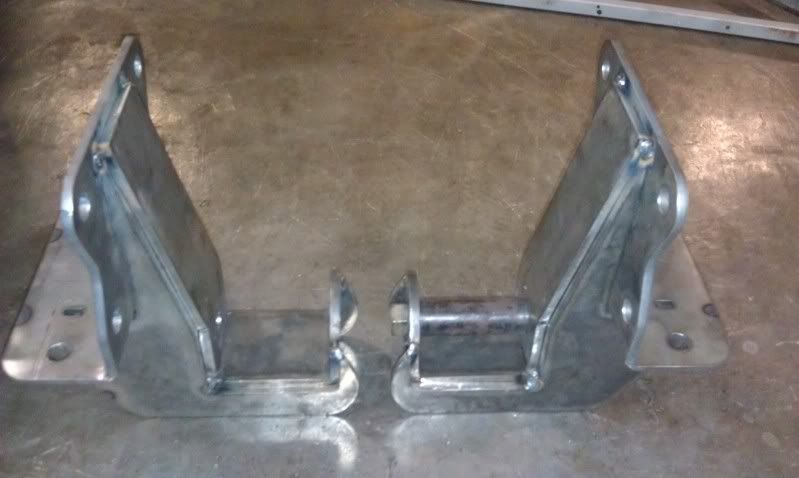
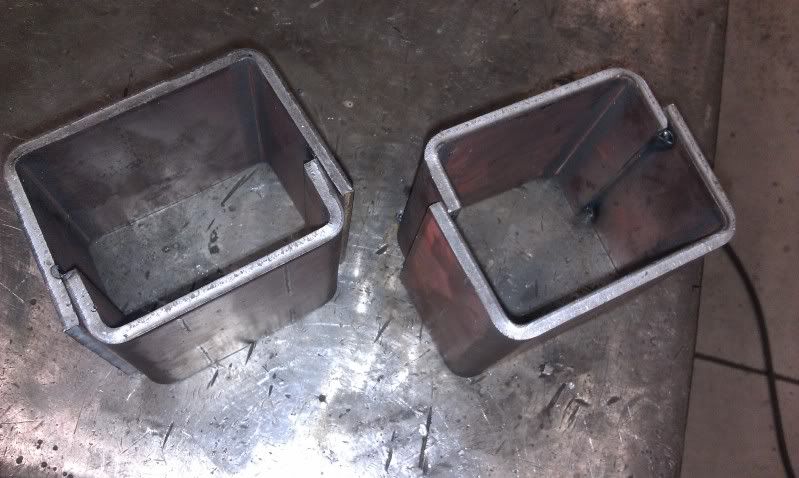
rear dropped shackle hangers.
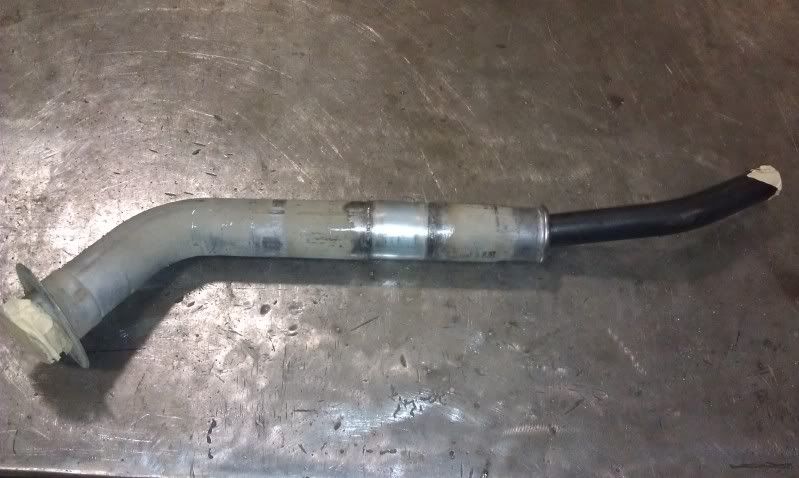
extender fuel filler to fit up to new glass.
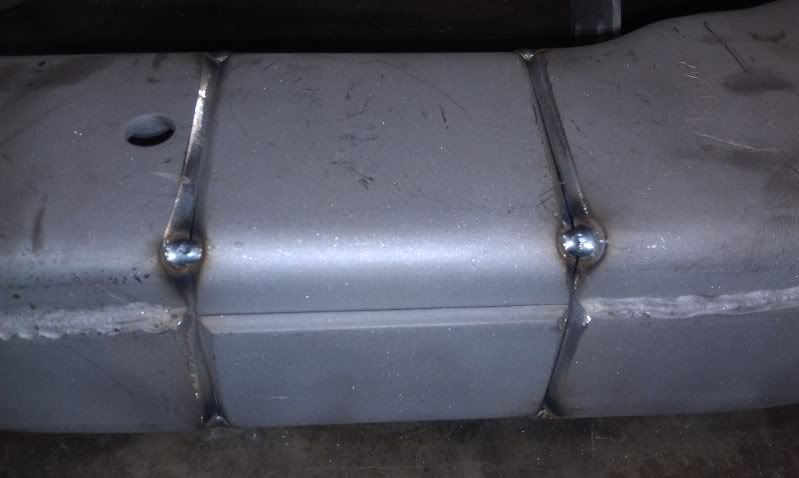
started working on beams. 4.5 extension. pretty stoked on these extension pieces.
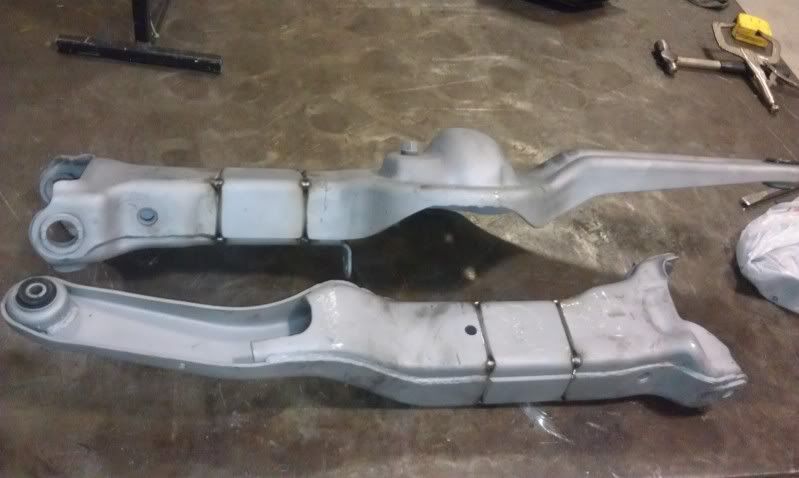
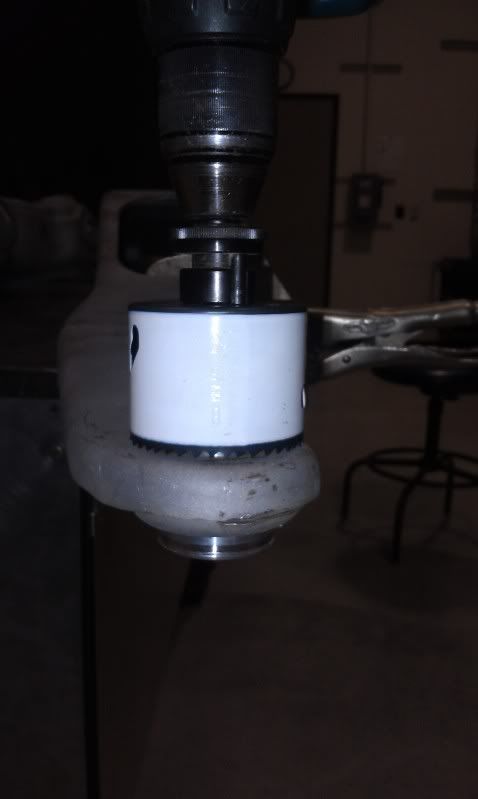
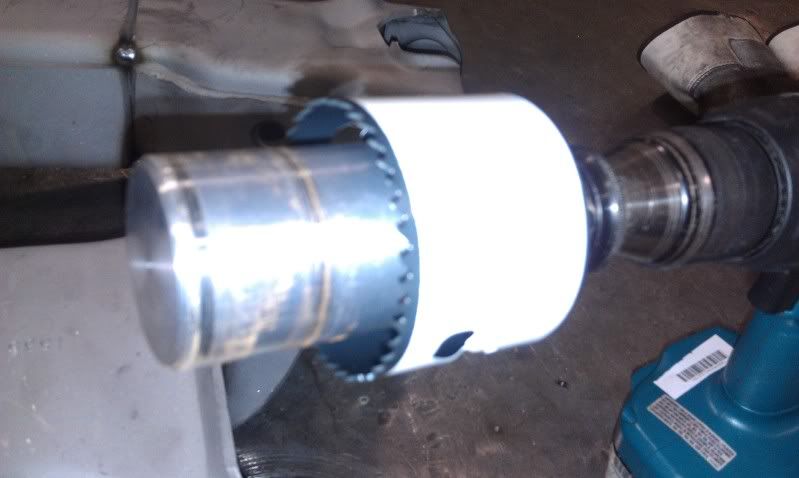
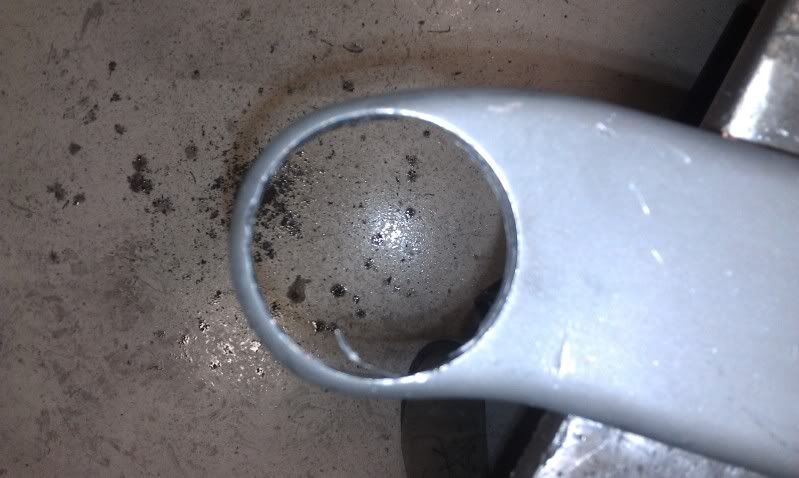
machined this hole saw pilot adapter thingy up. never opened these up for a uniball before but this is what i came up with. worked great. i got a tip that some guys are doing something similar to this but keeping the bushing in there while doing it but my bushings were squished so the sleeve wasn't exactly in the middle anymore. My way just seemed to lessen any further clean up afterward. the cup fits snug. not sure if anyone has a better way to do it but this worked quite well.
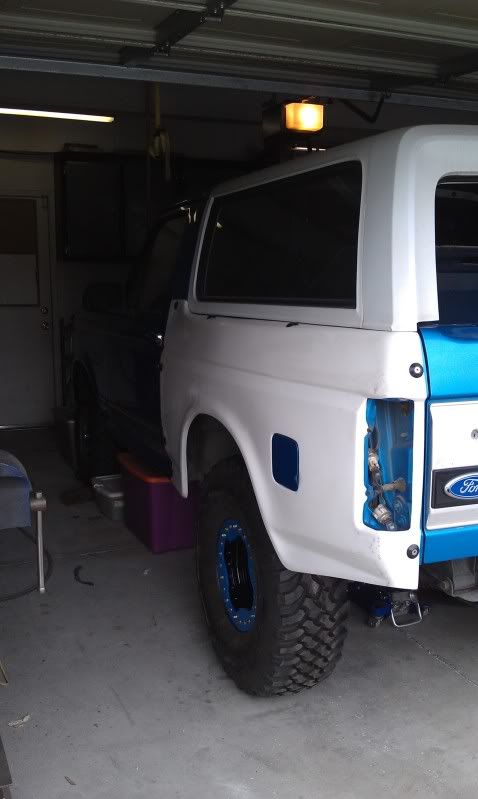
threw up the new wheels/tires to see how it looks.

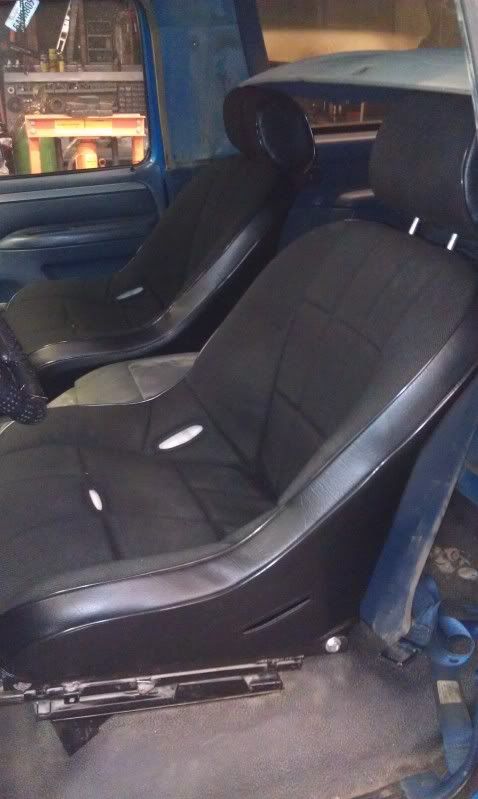
got new seats too, mounted on stock sliders. got the sliders from a guy that had em on his 96. i expected the pass. side to have the tilt with no slide. What year did that end? would my floor even fit that style direct bolt in? as it sits you would have to climb in between the front seats to get to the back but i wanna have a center console. ideas?
rear dropped shackle hangers.
extender fuel filler to fit up to new glass.
started working on beams. 4.5 extension. pretty stoked on these extension pieces.
machined this hole saw pilot adapter thingy up. never opened these up for a uniball before but this is what i came up with. worked great. i got a tip that some guys are doing something similar to this but keeping the bushing in there while doing it but my bushings were squished so the sleeve wasn't exactly in the middle anymore. My way just seemed to lessen any further clean up afterward. the cup fits snug. not sure if anyone has a better way to do it but this worked quite well.
threw up the new wheels/tires to see how it looks.
got new seats too, mounted on stock sliders. got the sliders from a guy that had em on his 96. i expected the pass. side to have the tilt with no slide. What year did that end? would my floor even fit that style direct bolt in? as it sits you would have to climb in between the front seats to get to the back but i wanna have a center console. ideas?
Kelly @ Kel Fab Creations
-
hobbyturnedobsession

- Posts: 4619
- Joined: Tue Apr 27, 2010 8:34 am
- Bronco Info: 96 c/o w/ 5.0
- Location: High Desert CA
Re: Kel Fab Creations Bronco Build
My 92 only slid forward. I just built my center console to hole the weight of a person getting in the rear. I do not believe the flip style will fit.
I'm just here for the views. It helps me feel wanted.
-
ESHALLBETTER

- Posts: 1588
- Joined: Fri Dec 11, 2009 8:49 am
- Bronco Info: 85 class 3, 70's somthing trail bronco.
- Location: Minneapolis, MN
Re: Kel Fab Creations Bronco Build
I dig your hangers!
- Attachments
-
- IMG116.jpg (254.92 KiB) Viewed 1556 times
-
greaslife
- Posts: 1128
- Joined: Fri Oct 28, 2011 6:24 pm
- Bronco Info: Home built is the way too go even if they don't like it.
- Location: inland impire
Re: Kel Fab Creations Bronco Build
i did the 96 slider on my 86 its not direct bolt in . but does fit the floor
I have been me for 32 years and know i cant spell for Sh!$ so get over it . Thanks Josh
-
Kel Fab Creations
- Posts: 727
- Joined: Wed Nov 23, 2011 2:01 pm
- Bronco Info: 95 Bronco
- Location: San Jacinto, Ca
- Contact:
Re: Kel Fab Creations Bronco Build
Yours look cool too.ESHALLBETTER wrote:I dig your hangers!
Kelly @ Kel Fab Creations
-
Kel Fab Creations
- Posts: 727
- Joined: Wed Nov 23, 2011 2:01 pm
- Bronco Info: 95 Bronco
- Location: San Jacinto, Ca
- Contact:
Re: Kel Fab Creations Bronco Build
Do u still have the tilt one? Just had to drill some holes?greaslife wrote:i did the 96 slider on my 86 its not direct bolt in . but does fit the floor
Kelly @ Kel Fab Creations
-
greaslife
- Posts: 1128
- Joined: Fri Oct 28, 2011 6:24 pm
- Bronco Info: Home built is the way too go even if they don't like it.
- Location: inland impire
Re: Kel Fab Creations Bronco Build
no tossed the tilt. yah drilled holes you have too remove a heat shield
I have been me for 32 years and know i cant spell for Sh!$ so get over it . Thanks Josh
-
Kel Fab Creations
- Posts: 727
- Joined: Wed Nov 23, 2011 2:01 pm
- Bronco Info: 95 Bronco
- Location: San Jacinto, Ca
- Contact:
Re: Kel Fab Creations Bronco Build
That damn heat shield rivited on sucks. For those 2 holes u can't get I just ended up drilling the holes out bigger and tapped for 1/2".
Kelly @ Kel Fab Creations
-
greaslife
- Posts: 1128
- Joined: Fri Oct 28, 2011 6:24 pm
- Bronco Info: Home built is the way too go even if they don't like it.
- Location: inland impire
Re: Kel Fab Creations Bronco Build
lol nice work by the way
I have been me for 32 years and know i cant spell for Sh!$ so get over it . Thanks Josh
-
Andy Jones

- Posts: 2209
- Joined: Tue Dec 08, 2009 2:47 pm
- Bronco Info: In the Works!
- Location: Canyon Lake,ca
- Contact:
Re: Kel Fab Creations Bronco Build
Very Nice!! will you be selling your shackle Hangers?.. I have the Solo Motorsports one's.. they just drop the stock hanger and relocate it for the 9" shackles.. I would like somthing more like yours.
dont PM me.. I don't get them on Taptalk
-
Kel Fab Creations
- Posts: 727
- Joined: Wed Nov 23, 2011 2:01 pm
- Bronco Info: 95 Bronco
- Location: San Jacinto, Ca
- Contact:
Re: Kel Fab Creations Bronco Build
Ya, i'll be selling these hangers. Off the top of my head they are only like a 1.25 drop I think. Just enough to clear the 6.25? center to center shackles I got with the 64 kit. let me know if u want some dropped more. I'll be selling these for 225.
Kelly @ Kel Fab Creations
-
Pre Run It
- Posts: 203
- Joined: Sat Feb 04, 2012 12:53 am
- Bronco Info: 93' 5.8 glass F & B 2.5 pro series FOX with Res, Caged, bfg projects beadlocks currie
- Location: Temecula, Ca
Re: Kel Fab Creations Bronco Build
You sure have made some progress and the shackles look sick. Now if you would hurry up and let me so those radius arms.... I know my bronco is gonna end up over there.