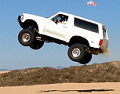
- IMG_4839 (Medium).JPG (198.41 KiB) Viewed 2548 times
Jim & Paige's Bronco
-
1Hondalover
- Posts: 819
- Joined: Mon May 14, 2012 2:30 pm
- Bronco Info: Having so much fun with friends in Baja, we're not sure if we want to race NORRA.....
- Location: Santa Clarita
Re: Jim & Paige's Bronco
The old fan/evaporator box that got eaten by the 37's Greg used to mock up the new aluminum trim:
Unfortunately this clearance mod renders the fresh air/recirc door inoperable, so we decided to pin it to the recirc side permanently. If we want fresh air we'll roll down the windows, but if the dust is flying we'll be inside on recirc anyway.
Unfortunately this clearance mod renders the fresh air/recirc door inoperable, so we decided to pin it to the recirc side permanently. If we want fresh air we'll roll down the windows, but if the dust is flying we'll be inside on recirc anyway.
-
ChaseTruck754
- Spy/Ninja
- Posts: 9194
- Joined: Thu Jan 28, 2010 9:46 am
- Bronco Info: Don't have one - just old Ford trucks
- Location: Huntington Beach, CA
Re: Jim & Paige's Bronco
they are going to town on this thing! Makes me wish I could work full days on my projects as I might actually get something done that way. This thing looks like it will be back together quickly!
-
hobbyturnedobsession

- Posts: 4673
- Joined: Tue Apr 27, 2010 8:34 am
- Bronco Info: 96 c/o w/ 5.0
- Location: High Desert CA
Re: Jim & Paige's Bronco
Looks super clean. The devil is in the details!
-
1Hondalover
- Posts: 819
- Joined: Mon May 14, 2012 2:30 pm
- Bronco Info: Having so much fun with friends in Baja, we're not sure if we want to race NORRA.....
- Location: Santa Clarita
Re: Jim & Paige's Bronco
July 2 - Dash complete and main power fab:
The dash is in and complete! Except for the dorky wheel cover (actually I can't stand the wheel either) it looks super nice. Greg was able to make really nice cuts in the top of the dash shell to go around the cage tubes with the windshield out......whoever did the other dash used a sawzall and not with any particular skill.
No point in pictures of the harness, but Blake was doing harness fab with ABS & airbag delete most of the day while the other things were going on. He entirely removed the unnecessary conductors and associated pieces to keep it clean. Blake also renovated the OE battery wiring to eliminate the factory battery position and include a larger marine cable from the relay to the starter.
We thought the Optimas might squeak into the rear corners, but no such luck. Greg had to make a mess of the shop floor again while he cut out some of the tub and recessed it enough to fit them in. Bummer this had to be done since the entire rear interior is slated for renovation in Phase 2.
The dash is in and complete! Except for the dorky wheel cover (actually I can't stand the wheel either) it looks super nice. Greg was able to make really nice cuts in the top of the dash shell to go around the cage tubes with the windshield out......whoever did the other dash used a sawzall and not with any particular skill.
No point in pictures of the harness, but Blake was doing harness fab with ABS & airbag delete most of the day while the other things were going on. He entirely removed the unnecessary conductors and associated pieces to keep it clean. Blake also renovated the OE battery wiring to eliminate the factory battery position and include a larger marine cable from the relay to the starter.
We thought the Optimas might squeak into the rear corners, but no such luck. Greg had to make a mess of the shop floor again while he cut out some of the tub and recessed it enough to fit them in. Bummer this had to be done since the entire rear interior is slated for renovation in Phase 2.
- IMG_4841 (Medium).JPG (186.71 KiB) Viewed 2451 times
- IMG_4848 (Medium).JPG (188 KiB) Viewed 2451 times
- IMG_4842 (Medium).JPG (171.94 KiB) Viewed 2451 times
- IMG_4844 (Medium).JPG (172.08 KiB) Viewed 2451 times
- IMG_4847 (Medium).JPG (183.49 KiB) Viewed 2451 times
-
1Hondalover
- Posts: 819
- Joined: Mon May 14, 2012 2:30 pm
- Bronco Info: Having so much fun with friends in Baja, we're not sure if we want to race NORRA.....
- Location: Santa Clarita
Re: Jim & Paige's Bronco
July 3 - Really coming together with mounting under the hood and Expedition center console:
After the battery mounting was complete, Greg went back under the hood to start putting the puzzle together. With the batteries out of the front there was some more room to play with and he started mounting all of the accessories. The UMP air filter housing will be permanently mounted with the tubing able to take a quick changeout to the OE air box when it comes time to smog. The radiator catch can and one of the larger OE pieces as the vacuum canister snugged right into the opposite side. Greg is maximizing every available space with custom mounting, leaving everything serviceable, removable and perfectly positioned in and around the engine cage.
I delivered the Expedition center console thanks to our friend Tony and Greg started playing with it too. We decided to place the battery switch down below the bottom of the console storage floor for security and ease of use. We played with the height to get my arm resting correctly on the super plush padded top. The gray color matches almost right on and the cupholders are big too. This is going to be good but now that all the gray is inside, the seats are sticking out like a sore thumb. Paige and I don't like brown anyway........hello Beard?
Put the proper hardware in the Autofab mounts along the way:
After the battery mounting was complete, Greg went back under the hood to start putting the puzzle together. With the batteries out of the front there was some more room to play with and he started mounting all of the accessories. The UMP air filter housing will be permanently mounted with the tubing able to take a quick changeout to the OE air box when it comes time to smog. The radiator catch can and one of the larger OE pieces as the vacuum canister snugged right into the opposite side. Greg is maximizing every available space with custom mounting, leaving everything serviceable, removable and perfectly positioned in and around the engine cage.
I delivered the Expedition center console thanks to our friend Tony and Greg started playing with it too. We decided to place the battery switch down below the bottom of the console storage floor for security and ease of use. We played with the height to get my arm resting correctly on the super plush padded top. The gray color matches almost right on and the cupholders are big too. This is going to be good but now that all the gray is inside, the seats are sticking out like a sore thumb. Paige and I don't like brown anyway........hello Beard?
- IMG_4856 (Medium).JPG (185.24 KiB) Viewed 2447 times
- IMG_4861 (Medium).JPG (150.18 KiB) Viewed 2447 times
- IMG_4864 (Medium).JPG (156.5 KiB) Viewed 2447 times
- IMG_4878 (Medium).JPG (195.41 KiB) Viewed 2447 times
- IMG_4867 (Medium).JPG (252.66 KiB) Viewed 2447 times
- IMG_4876 (Medium).JPG (174.94 KiB) Viewed 2447 times
-
1Hondalover
- Posts: 819
- Joined: Mon May 14, 2012 2:30 pm
- Bronco Info: Having so much fun with friends in Baja, we're not sure if we want to race NORRA.....
- Location: Santa Clarita
Re: Jim & Paige's Bronco
More July 3 - under the hood mounting and center console discovery:
- IMG_4868 (Medium).JPG (202.14 KiB) Viewed 2442 times
- IMG_4869 (Medium).JPG (186.2 KiB) Viewed 2442 times
- IMG_4872 (Medium).JPG (220.44 KiB) Viewed 2442 times
- IMG_4880 (Medium).JPG (168.77 KiB) Viewed 2442 times
- IMG_4865 (Medium).JPG (195.48 KiB) Viewed 2442 times
- Attachments
-
- IMG_4852 (Medium).JPG (228.06 KiB) Viewed 2442 times
-
1Hondalover
- Posts: 819
- Joined: Mon May 14, 2012 2:30 pm
- Bronco Info: Having so much fun with friends in Baja, we're not sure if we want to race NORRA.....
- Location: Santa Clarita
Re: Jim & Paige's Bronco
More July 3 - Center console mockup:
- IMG_4855 (Medium).JPG (190.58 KiB) Viewed 2440 times
-
cs_drums
- Posts: 2912
- Joined: Wed Dec 22, 2010 10:39 am
- Bronco Info: 94 5.8 Bronco w/dreams of being finished
Re: Jim & Paige's Bronco
Very impressed with the attention to detail with this project. It's the opposite of most projects, tearing out stock and replacing with aftermarket. I would not want to take on a project of that magnitude but they seem to be tackling it with ease.
-
1Hondalover
- Posts: 819
- Joined: Mon May 14, 2012 2:30 pm
- Bronco Info: Having so much fun with friends in Baja, we're not sure if we want to race NORRA.....
- Location: Santa Clarita
Re: Jim & Paige's Bronco
Thank you.....though the compliment belongs to Greg and Blake. We're a commercial & industrial electrical contractor, and I'm super anal about what my staff installs. I talked to several people or shops about this project and I think it scared some of them when I described what we wanted. Autofab John was going to take it on for me and I'm sure he would have done just as nice of a job, but there have been many questions and comments such that I visit the Bronco two times most days. For this reason I'm glad Greg was finally able to make space for us just a few miles from my office.....even if he did it 9 months late.cs_drums wrote:Very impressed with the attention to detail with this project. It's the opposite of most projects, tearing out stock and replacing with aftermarket. I would not want to take on a project of that magnitude but they seem to be tackling it with ease.
Greg is very talented as I said in the beginning. His "real world" thought/planning process is very efficient, and his work product parallels what he does on TT42.
We're very fortunate to have his help on this renovation.
-
1Hondalover
- Posts: 819
- Joined: Mon May 14, 2012 2:30 pm
- Bronco Info: Having so much fun with friends in Baja, we're not sure if we want to race NORRA.....
- Location: Santa Clarita
Re: Jim & Paige's Bronco
The Beard seats are now hideous with the gray, so Paige gets in the mix for interior design. She had a cool idea to put the abstract part of our logo on the upper part of some new seat covers. Brad at Beard is sending some vinyl and suede samples.....I hope they can do some embroidery!
No need to comment on this particular color choice because it's just an example for the logo purposes to Beard. I'm sure Paige will hit the right mix of black, gray and/or red.
No need to comment on this particular color choice because it's just an example for the logo purposes to Beard. I'm sure Paige will hit the right mix of black, gray and/or red.
- Beard seat example (Small).jpg (48.57 KiB) Viewed 2408 times
-
tcm glx

- Peanut Butter
- Posts: 7309
- Joined: Tue Dec 08, 2009 11:19 am
- Bronco Info: 93 Ford Bronco 5.8
- Location: Riverside Ca
- Contact:
Re: Jim & Paige's Bronco
WOW, love the pace you guys are moving on the rebuild Jim!!
I Also think light grey, with dark grey and the red piping looks great for the seats. Add your logo to the headrest as shown and they will look perfect!! Looking forward to more pics....
I Also think light grey, with dark grey and the red piping looks great for the seats. Add your logo to the headrest as shown and they will look perfect!! Looking forward to more pics....
-
ChaseTruck754
- Spy/Ninja
- Posts: 9194
- Joined: Thu Jan 28, 2010 9:46 am
- Bronco Info: Don't have one - just old Ford trucks
- Location: Huntington Beach, CA
Re: Jim & Paige's Bronco
Looking very good. Love the redo going on.
As for Beard being able to do the stitchwork like you have shown - they sure can.
As for Beard being able to do the stitchwork like you have shown - they sure can.
-
SteveG
- Admin
- Posts: 6177
- Joined: Sat Dec 05, 2009 10:25 am
- Bronco Info: Wilson: 96, Stretched 17.5", coil-overs / Bypasses, 4-link, a fridge and all the amenities :)
- Location: Arroyo Grande, CA
Re: Jim & Paige's Bronco
The guys are killing it, Jim! I'm glad it worked out so you were able to have the work done locally... removes a lot of stress!
-
Dezertbronco
- Posts: 652
- Joined: Fri Jan 22, 2010 12:29 am
- Bronco Info: 1990 Bronco EB
- Location: Highland, CA.
Re: Jim & Paige's Bronco
My favorite build.... 
-
1Hondalover
- Posts: 819
- Joined: Mon May 14, 2012 2:30 pm
- Bronco Info: Having so much fun with friends in Baja, we're not sure if we want to race NORRA.....
- Location: Santa Clarita
Re: Jim & Paige's Bronco
July 7 - Greg and Blake take a few days off and start reigning in the electrical when they get back:
The boys on a mission again, trying to squeeze the project up to under the hood work and completion. By this time Greg has measured for a new driveshaft under construction, and is considering exhaust options which aren't many with links, skids and the length of the OE exhaust. While Blake gets after the #1/0 cable main power fabrication, Greg fabs the new center console (thanks again Tony!) with the battery switch relocated to the floor under the it. Now we'll be able to lift a bucket out of the storage part and turn the switch......easy, simple, clean and secure.
I'm going to handle all of the accessory wiring back at home, but as usual Greg has to think 10 steps ahead in preparation. With the cavernous console, there's lots of room under it for the accessory power distribution, relays and wiring necessary. By the time I could consider it, he whips out a removable aluminum plate with quick release mounting to hold all of the electrical business. The beauty is that the console will come off the floor with 4 small bolts and leave all of the electrical on the chassis for service and upgrade!
No sooner is that complete that I see electrical mounting fab going on under the hood when I return in the late afternoon. Greg and I talk about the difference between the word "Gucci" and my budget.....he understands. I go to the other side of the Bronco and see what he has cooking for fuse box, which is now laughing at the 37" tire because it has no chance of touching at full compression. Factory fuse box lid and all OE! A few more mods will be made to the harness at the left front corner to clean it up and lengthen the lighting conductors to get around the UMP.
The boys on a mission again, trying to squeeze the project up to under the hood work and completion. By this time Greg has measured for a new driveshaft under construction, and is considering exhaust options which aren't many with links, skids and the length of the OE exhaust. While Blake gets after the #1/0 cable main power fabrication, Greg fabs the new center console (thanks again Tony!) with the battery switch relocated to the floor under the it. Now we'll be able to lift a bucket out of the storage part and turn the switch......easy, simple, clean and secure.
I'm going to handle all of the accessory wiring back at home, but as usual Greg has to think 10 steps ahead in preparation. With the cavernous console, there's lots of room under it for the accessory power distribution, relays and wiring necessary. By the time I could consider it, he whips out a removable aluminum plate with quick release mounting to hold all of the electrical business. The beauty is that the console will come off the floor with 4 small bolts and leave all of the electrical on the chassis for service and upgrade!
No sooner is that complete that I see electrical mounting fab going on under the hood when I return in the late afternoon. Greg and I talk about the difference between the word "Gucci" and my budget.....he understands. I go to the other side of the Bronco and see what he has cooking for fuse box, which is now laughing at the 37" tire because it has no chance of touching at full compression. Factory fuse box lid and all OE! A few more mods will be made to the harness at the left front corner to clean it up and lengthen the lighting conductors to get around the UMP.
- IMG_4978 (Medium).JPG (189.97 KiB) Viewed 2321 times
- IMG_4979 (Medium).JPG (200.16 KiB) Viewed 2321 times
- IMG_4981 (Medium).JPG (194.84 KiB) Viewed 2321 times
- IMG_4985 (Medium).JPG (194.16 KiB) Viewed 2321 times
- IMG_4988 (Medium).JPG (209.03 KiB) Viewed 2321 times
- IMG_4986 (Medium).JPG (234.56 KiB) Viewed 2321 times
-
Nick

- Founder
- Posts: 3973
- Joined: Sat Dec 05, 2009 12:36 pm
- Bronco Info: 1995 bird poop target
- Location: La Habra Ca.
Re: Jim & Paige's Bronco
Wow! Jim, very impressive build!
-
robertcrav
- Let me google that for you
- Posts: 4313
- Joined: Thu Jan 13, 2011 8:06 am
- Bronco Info: Lana - Stock width c/t coil-overs/bypasses -- Sylvia - Stock width 4" Rancho kit on Billies
- Location: South O.C.
- Contact:
Re: Jim & Paige's Bronco
Jaw is on the floor....fantastic progress and work
-
Rmc
- El Jefe
- Posts: 6028
- Joined: Tue Oct 09, 2012 10:22 pm
- Bronco Info: 94 bronco xlt prerunner
- Location: IE SoCal
- Contact:
Re: Jim & Paige's Bronco
There's a lot of time in that build for sure. I like the air filter location. Very cool .
-
1Hondalover
- Posts: 819
- Joined: Mon May 14, 2012 2:30 pm
- Bronco Info: Having so much fun with friends in Baja, we're not sure if we want to race NORRA.....
- Location: Santa Clarita
Re: Jim & Paige's Bronco
- IMG_5021 (Medium).JPG (196.35 KiB) Viewed 2218 times
-
robertcrav
- Let me google that for you
- Posts: 4313
- Joined: Thu Jan 13, 2011 8:06 am
- Bronco Info: Lana - Stock width c/t coil-overs/bypasses -- Sylvia - Stock width 4" Rancho kit on Billies
- Location: South O.C.
- Contact:
Re: Jim & Paige's Bronco
You will LOVE this