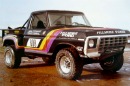
Rod's 84 BabyBajaF100
-
Quailhunter
- Posts: 356
- Joined: Sat Jul 31, 2010 7:29 am
- Bronco Info: 74 F100 Stepside 408 sbf complete Autofab truck 74 F-250 Supercab Shortbed
- Location: San Diego,CA
Re: Rod's 84 BabyBajaF100
Rod's back! good to hear from you.
-
scraptor
- Posts: 108
- Joined: Sun Aug 21, 2011 3:30 pm
- Bronco Info: 1994 f150 bronco wannabe
- Location: nova scotia canada help me !!!!
Re: Rod's 84 BabyBajaF100
Yes, people on the opposite end of the world were worried.Quailhunter wrote:Rod's back! good to hear from you.
-
Dust
- Posts: 781
- Joined: Fri Mar 12, 2010 1:41 pm
- Bronco Info: Go Slow Ford's From 1957 to 1994
- Location: Central Oregon
Re: Rod's 84 BabyBajaF100
I concur.scraptor wrote:Yes, people on the opposite end of the world were worried.
-
AussieRod

- Posts: 2804
- Joined: Sun Sep 05, 2010 1:43 am
- Bronco Info: 81 Bronco XLT, 250 alloy head crossflow 6, NP435/NP208, 4:10 gears, 31-10.5R15 M/Ts.
- Location: Downunder
Re: Rod's 84 BabyBajaF100
Seeing as it is the so-called Australia Day holiday today, I decided to get re-aquainted with my F100. She has been patiently waiting for me and I finally got tired of squeezing past it in my garage. After pushing it out of the garage back to it's customary place under the carport, I preceded to use the air hose and a soft cloth to remove several months of dust and cobweb/spiderwebs and the few redbacks that have accumulated in/on it from storage. I will pick up the paint and a new finishing gun later this week and start prepping the cab, doors and front panels for their new coat of colour. Once that is done, the donor engine will come out and that will get cleaned and prepped ready for installing with the Monster AOD and 208 I have waiting for it. I'd better pick up some new batteries for my camera to take some long overdue progress pics too. Hopefully I can shame Tom into updating the Minty Monster, too. Stay tuned.
-
ChaseTruck754

- Spy/Ninja
- Posts: 9194
- Joined: Thu Jan 28, 2010 9:46 am
- Bronco Info: Don't have one - just old Ford trucks
- Location: Huntington Beach, CA
Re: Rod's 84 BabyBajaF100
Good plan & good to hear it's still alive.
Owner of only dead and forgotten projects
-
Wrightracing.net

- Posts: 2217
- Joined: Thu Oct 28, 2010 9:58 pm
- Bronco Info: 1972 Bronco with an 86 chassis, full cage and Long travel coil-over suspension.
- Location: San Diego
- Contact:
-
AussieRod
- Posts: 2804
- Joined: Sun Sep 05, 2010 1:43 am
- Bronco Info: 81 Bronco XLT, 250 alloy head crossflow 6, NP435/NP208, 4:10 gears, 31-10.5R15 M/Ts.
- Location: Downunder
Re:
Thanks, Mate, I've had an awful lot on my plate for a while, and hopefully, the light at the end of the tunnel ins't a train. Don't worry, you aren't the first to be thrown by the RHD.Wrightracing.net wrote:Good to hear from you Rod. I would love to get a Right hand drive like yours. The first time I looked at pictures of it, I thought something was wrong with the picture. Lol.
I've picked up a new finishing gun for the paint, and will be picking that up Wednesday, along with some other supplies, and I will start prepping it after the weekend. We have to prepare for Chinese New Year and it will take up some (if not all) of my time, so the following week, I will re-start the project and get 'er done.
\Cheers.
-
AussieRod
- Posts: 2804
- Joined: Sun Sep 05, 2010 1:43 am
- Bronco Info: 81 Bronco XLT, 250 alloy head crossflow 6, NP435/NP208, 4:10 gears, 31-10.5R15 M/Ts.
- Location: Downunder
Re: Rod's 84 BabyBajaF100
Thursday 11 Feb update:
Have the new paint gun, picked up the can of paint today and now just need some spot filler, sanding sheets, etc and can get ready to start final prep of cab, tub and doors. I'm looking forward to getting it painted and then getting the mechanicals ready for install. The stepdaughter pisses off to uni this weekend, so I will have heaps more time to devote to it. I want to drive it THIS YEAR!
Have the new paint gun, picked up the can of paint today and now just need some spot filler, sanding sheets, etc and can get ready to start final prep of cab, tub and doors. I'm looking forward to getting it painted and then getting the mechanicals ready for install. The stepdaughter pisses off to uni this weekend, so I will have heaps more time to devote to it. I want to drive it THIS YEAR!
-
ChaseTruck754
- Spy/Ninja
- Posts: 9194
- Joined: Thu Jan 28, 2010 9:46 am
- Bronco Info: Don't have one - just old Ford trucks
- Location: Huntington Beach, CA
Re: Rod's 84 BabyBajaF100
Hopefully you make more progress on your "this year" goal than I do. Driving my crew has been my "new years resolution" for what, like 5-6 years now. lol
Owner of only dead and forgotten projects
-
AussieRod
- Posts: 2804
- Joined: Sun Sep 05, 2010 1:43 am
- Bronco Info: 81 Bronco XLT, 250 alloy head crossflow 6, NP435/NP208, 4:10 gears, 31-10.5R15 M/Ts.
- Location: Downunder
Re: Rod's 84 BabyBajaF100
March 29 update:
When it rains, it pours, so they say. 3 days after my last post I was punching holes in a rubber gasket at work and BAM, slugged the index and middle fingers on my left hand. Dunno what happened, but the hammer glanced off the hole punch and hit full force, breaking the middle bones in both fingers. It is said that the most painful bones to break in/on your hand is the thumb and middle finger, and I concur. The index was a clean break, but the middle was 4 fractures and hurt like F**K!
Today I've braved the pain and started work on the truck.The bones have knitted and are holding well, but they still hurt like buggery when hit or bumped wrong. I cut off the cast and use aluminium splints during waking hours, except when working like today.
First, I replaced the casters on my tub trolley (the little wheels collapsed under the weight) with HD ones I saved from a job at work:
Then I began work on the RH guard (fender) to repair the rusty sections. I added strips to hold the inner and outer together firmly:
Then welded a few areas where the spot welds had broken or rusted away:
I'll do some clean up and fill the rust voids with fibre reinforced filler. The rear leg will be plated on the inside and the same filler applied, then the outsides will be filled with normal filler and sanded.
More to follow.
When it rains, it pours, so they say. 3 days after my last post I was punching holes in a rubber gasket at work and BAM, slugged the index and middle fingers on my left hand. Dunno what happened, but the hammer glanced off the hole punch and hit full force, breaking the middle bones in both fingers. It is said that the most painful bones to break in/on your hand is the thumb and middle finger, and I concur. The index was a clean break, but the middle was 4 fractures and hurt like F**K!
Today I've braved the pain and started work on the truck.The bones have knitted and are holding well, but they still hurt like buggery when hit or bumped wrong. I cut off the cast and use aluminium splints during waking hours, except when working like today.
First, I replaced the casters on my tub trolley (the little wheels collapsed under the weight) with HD ones I saved from a job at work:
- P1010344.JPG (82.14 KiB) Viewed 864 times
- P1010340.JPG (87.55 KiB) Viewed 864 times
- P1010341.JPG (87.4 KiB) Viewed 864 times
- P1010342.JPG (75.19 KiB) Viewed 864 times
- P1010343.JPG (79.47 KiB) Viewed 864 times
More to follow.
-
AussieRod
- Posts: 2804
- Joined: Sun Sep 05, 2010 1:43 am
- Bronco Info: 81 Bronco XLT, 250 alloy head crossflow 6, NP435/NP208, 4:10 gears, 31-10.5R15 M/Ts.
- Location: Downunder
Re: Rod's 84 BabyBajaF100
Inner rust areas filled. I will run the sander over the hairier parts later after it hardens fully:
I then welded a small piece of sheet into the rust area at the bottom of the leg and roughed it to hold the filler:
Then filled neatly over it with fibre reinforced filler:
After that, I did a preliminary fill to start the repair on the outside and sanded it down rough for a second app:
I've got tomorrow to myself until 6 pm when I have go to my 2nd job, so I will try to have it primer ready tomorrow arvo.
More to follow
- P1010346.JPG (87.25 KiB) Viewed 869 times
- P1010347.JPG (84.8 KiB) Viewed 869 times
- P1010345.JPG (87.75 KiB) Viewed 869 times
- P1010348.JPG (75.35 KiB) Viewed 869 times
- P1010349.JPG (89.76 KiB) Viewed 869 times
- P1010350.JPG (85.32 KiB) Viewed 869 times
More to follow
-
ChaseTruck754
- Spy/Ninja
- Posts: 9194
- Joined: Thu Jan 28, 2010 9:46 am
- Bronco Info: Don't have one - just old Ford trucks
- Location: Huntington Beach, CA
Re: Rod's 84 BabyBajaF100
you just can't catch a break can you?!?! Good to see you still have the motivation to get out there and get after it!
Owner of only dead and forgotten projects
-
AussieRod
- Posts: 2804
- Joined: Sun Sep 05, 2010 1:43 am
- Bronco Info: 81 Bronco XLT, 250 alloy head crossflow 6, NP435/NP208, 4:10 gears, 31-10.5R15 M/Ts.
- Location: Downunder
Re: Rod's 84 BabyBajaF100
Story of my life, SteveChaseTruck754 wrote:you just can't catch a break can you?!?! Good to see you still have the motivation to get out there and get after it!
-
AussieRod
- Posts: 2804
- Joined: Sun Sep 05, 2010 1:43 am
- Bronco Info: 81 Bronco XLT, 250 alloy head crossflow 6, NP435/NP208, 4:10 gears, 31-10.5R15 M/Ts.
- Location: Downunder
Re: Rod's 84 BabyBajaF100
March 30:
Spent a few hours between chores filling and sanding, rinse and repeat. Here it is all done ready for primer in it's silky smoothness:
Did a small refill on the LH side to get rid of a few air bubbles that I missed:
I'm taking my sand bucket to work tomorrow to scab some more garnet. I'll blast the inside of the RH fender, the hood underside and clean up the cowl panel ready for primer, then mix some primer surfacer and hit them up with a good coat. In the meantime, I will also remove the tub and prep it underneath for paint, the inside for stone chip and a coat of colour.
Stay tuned.
Spent a few hours between chores filling and sanding, rinse and repeat. Here it is all done ready for primer in it's silky smoothness:
- P1010351.JPG (85.76 KiB) Viewed 825 times
- P1010352.JPG (86.79 KiB) Viewed 825 times
- P1010353.JPG (87.04 KiB) Viewed 825 times
Stay tuned.
-
AussieRod
- Posts: 2804
- Joined: Sun Sep 05, 2010 1:43 am
- Bronco Info: 81 Bronco XLT, 250 alloy head crossflow 6, NP435/NP208, 4:10 gears, 31-10.5R15 M/Ts.
- Location: Downunder
Re: Rod's 84 BabyBajaF100
April 2:
Carried on from Wednesday and started on the valance and cowl panels with sander and blaster:
All done, ready for primer:
The, ah, "fruits" of my labours:
Also got into the hood, just need to hand sand the underside and a small amount of filler on the front right and it too is ready for primer:
Tomorrow I'm off to visit my Dad for his 75th, so I will get back to it all Tuesday.
Cheers.
Carried on from Wednesday and started on the valance and cowl panels with sander and blaster:
- P1010354.JPG (75.59 KiB) Viewed 779 times
- P1010356.JPG (81.42 KiB) Viewed 779 times
- P1010357.JPG (88.14 KiB) Viewed 779 times
- P1010358.JPG (78.4 KiB) Viewed 779 times
- P1010359.JPG (77.97 KiB) Viewed 779 times
- P1010361.JPG (72.34 KiB) Viewed 779 times
Cheers.
-
AussieRod
- Posts: 2804
- Joined: Sun Sep 05, 2010 1:43 am
- Bronco Info: 81 Bronco XLT, 250 alloy head crossflow 6, NP435/NP208, 4:10 gears, 31-10.5R15 M/Ts.
- Location: Downunder
Re: Rod's 84 BabyBajaF100
OK, gonna try another update (3rd time lucky?):
I've been slowly working on getting the hood up to scratch, finally, and being busy these last 2 weeks because my Dad has been having problems, I haven't had too much time to devote to it. Plus, my second job has gone from 3 nights to 4 nights a week and looks like might become 5, I'll have to shedule time as it comes available. Anyway, on to the update.
Did a little work on the tub, had to move one of the propane tank reinforcements because the strap was over the end cap weld. I was hoping to move the tank to as far left as possible to squeeze a battery into the right front corner, but it's too tight. Removing the old support would rip up the floor too much, so I made another and welded it in beside the old one:
Been working on making a fuel pump access door. I'm fabbing something at work for this and will fit it once it's ready:
I also cut out the humps in the front inner walls (I've capped the holes on the top) and will plate these over with sheet:
I inherited this uglyness from the previous owner:
I was planning to build a bedcage, but have decided to spend time finishing the truck. I'll worry about this stuff AFTER it is registered again, as any fab stuff might give the RWC inspector a reason to can my efforts. More to follow.
I've been slowly working on getting the hood up to scratch, finally, and being busy these last 2 weeks because my Dad has been having problems, I haven't had too much time to devote to it. Plus, my second job has gone from 3 nights to 4 nights a week and looks like might become 5, I'll have to shedule time as it comes available. Anyway, on to the update.
Did a little work on the tub, had to move one of the propane tank reinforcements because the strap was over the end cap weld. I was hoping to move the tank to as far left as possible to squeeze a battery into the right front corner, but it's too tight. Removing the old support would rip up the floor too much, so I made another and welded it in beside the old one:
- P1010366.JPG (68.79 KiB) Viewed 704 times
- P1010367.JPG (69.39 KiB) Viewed 704 times
- P1010368.JPG (71.18 KiB) Viewed 704 times
- P1010371.JPG (70.55 KiB) Viewed 704 times
- P1010372.JPG (70.87 KiB) Viewed 704 times
- P1010373.JPG (84.76 KiB) Viewed 704 times
-
AussieRod
- Posts: 2804
- Joined: Sun Sep 05, 2010 1:43 am
- Bronco Info: 81 Bronco XLT, 250 alloy head crossflow 6, NP435/NP208, 4:10 gears, 31-10.5R15 M/Ts.
- Location: Downunder
Re: Rod's 84 BabyBajaF100
Saturday's effort:
Finally had time to throw on some primer and paint. I dithered around too much this morning and started late, trying to decide how I was going to plan the painting part. I decided to just get as much done as I could. First, I re-sanded and primed the hood. Then give the fenders a good clean up inside to prepare for white. First time I've used a gravity feed HVLP gun and it didn't come out too bad. White on fender insides:
Cowl and valance painted white on the back sides:
Hood primed inside and out. The white is metal epoxy paint, the no-primer-needed stuff, so I will see how well it hold up (or on, so to speak). Imight paint the hood inside white tonight if the weather and daylight holds:
IF I dont have to take the wife to Melbourne tomorrow for shopping, I will sand the cab, mask off the areas I dont want body colour and get ready to throw on some final colour. Going out now to start sorting out what engine I will put in this thing. More updates later.
Finally had time to throw on some primer and paint. I dithered around too much this morning and started late, trying to decide how I was going to plan the painting part. I decided to just get as much done as I could. First, I re-sanded and primed the hood. Then give the fenders a good clean up inside to prepare for white. First time I've used a gravity feed HVLP gun and it didn't come out too bad. White on fender insides:
- P1010396.JPG (75.93 KiB) Viewed 700 times
- P1010395.JPG (79.05 KiB) Viewed 700 times
- P1010397.JPG (89.28 KiB) Viewed 700 times
- P1010398.JPG (81 KiB) Viewed 700 times
-
AussieRod
- Posts: 2804
- Joined: Sun Sep 05, 2010 1:43 am
- Bronco Info: 81 Bronco XLT, 250 alloy head crossflow 6, NP435/NP208, 4:10 gears, 31-10.5R15 M/Ts.
- Location: Downunder
Re: Rod's 84 BabyBajaF100
Sunday update:
Lucky for me, I didn't have to go to Melbourne today, so after taking the missus to the local market (and nearly getting run off the road by some fuckwit who thought it a good idea to try and squeeze me out of a 2 into one into oncoming traffic and lost out due to a cyclist getting in his way), I took up where I left off. Gave the hood underside another good rub out and cleaned thoroughly with thinners, I laid on some white:
All the white painted bits got hung on the sun drenched clothes line to make sure they dried well:
Having a break from roughing down the cab for the new colour:
I then put some of the new colour into the driver's (RHS) door jamb so I can fit the door tomorrow, then after a careful smooting and clean, added same to the inside of the driver's door:
The colour is Sahara Dust, an old Land Rover colour used on the earlier classic Range Rovers. I used to have a Rangey in this colour and I had quite a liking for it. It should look great on the F100 (it's also a good base for camo, too  )
)
Tomorrow is Anzac Day holiday, so I will mask off the cab and try to get the door fitted and the cab painted. More updates to come.
Lucky for me, I didn't have to go to Melbourne today, so after taking the missus to the local market (and nearly getting run off the road by some fuckwit who thought it a good idea to try and squeeze me out of a 2 into one into oncoming traffic and lost out due to a cyclist getting in his way), I took up where I left off. Gave the hood underside another good rub out and cleaned thoroughly with thinners, I laid on some white:
- P1010399.JPG (74.29 KiB) Viewed 678 times
- P1010400.JPG (74.87 KiB) Viewed 678 times
- P1010401.JPG (75.2 KiB) Viewed 678 times
- P1010402.JPG (87.94 KiB) Viewed 678 times
- P1010403.JPG (73.17 KiB) Viewed 678 times
- P1010404.JPG (74.82 KiB) Viewed 678 times
Tomorrow is Anzac Day holiday, so I will mask off the cab and try to get the door fitted and the cab painted. More updates to come.
-
AussieRod
- Posts: 2804
- Joined: Sun Sep 05, 2010 1:43 am
- Bronco Info: 81 Bronco XLT, 250 alloy head crossflow 6, NP435/NP208, 4:10 gears, 31-10.5R15 M/Ts.
- Location: Downunder
Re: Rod's 84 BabyBajaF100
Monday update:
Well, it's been bloody glorious here for 3 WHOLE days! Mid 20's C weather, virtually no wind and 2 days without the wife to bother me and FINALLY THE CAB IS PAINTED! (And the driver's door too). 3 solid hours of elbow grease and sweat to get it ready and 20 mins to flow on the colour. It has 3 coats in the high wear areas and 2 coats overall. First coat was 10% thinner and second 20%, and it flowed on nicely:
Door isn't painted on the outside here, but it is now:
Just wolfing down lunch now, then back outside to paint the cowl, edge the fenders and maybe the hood if I have time and as soon as the paint is firmly touch dry, I will paint the inside steel roof liner satin tan.
Updates to follow.
Well, it's been bloody glorious here for 3 WHOLE days! Mid 20's C weather, virtually no wind and 2 days without the wife to bother me and FINALLY THE CAB IS PAINTED! (And the driver's door too). 3 solid hours of elbow grease and sweat to get it ready and 20 mins to flow on the colour. It has 3 coats in the high wear areas and 2 coats overall. First coat was 10% thinner and second 20%, and it flowed on nicely:
- P1010405.JPG (85.72 KiB) Viewed 653 times
- P1010406.JPG (75.55 KiB) Viewed 653 times
- P1010407.JPG (82.08 KiB) Viewed 653 times
Updates to follow.
-
AussieRod
- Posts: 2804
- Joined: Sun Sep 05, 2010 1:43 am
- Bronco Info: 81 Bronco XLT, 250 alloy head crossflow 6, NP435/NP208, 4:10 gears, 31-10.5R15 M/Ts.
- Location: Downunder
Re: Rod's 84 BabyBajaF100
Figured I needed an update. Tuesday 10th May:
I've been working on the F100 any chance I get, doing little jobs here and there. I had realised that I hadn't stoneguarded the bottom of the driver's door prior to paint, so I masked off the area needed and also did the fender bottoms, prepped the valance panel, front hood edge and the front and bottoms of the tub. 1 can of stoneguard JUST did the lot, and I allowed it to set for a day or two before sanding and prepping the driver door, valance, cowl and hood for colour. Saturday I threw on some colour and got these parts ready for install. I ran out of time to paint the centre of the hood in flat black, so I have to wait for good weather to finish that off. Since sunday it has been raining cats and dogs, so painting is out of the question. On the other hand, once the paint dried on the door, I started fitting the new seals, glass and winder to the driver door. All done:
Also fitted the rear window as well. What a bastard of a job! It took a fair bit of work to finally figure out what was going wrong and with a struggle, in it went:
Even the GFB and JL stickers have survived!
The painted inside roof:
The passenger door, ready for dis-assembly and sanding/blasting:
I've decided to go with a 5.0L V8. I got a quote for the machine work ONLY on the 351C and it was just over $2,000, so that will wait. I have a 2000 explorer long motor with a damaged block, a 320K km 5.0L short along with a complete 5.0L from my brother's Falcon XR8 (540K km) to raid bits from, so I will build a motor from these. Explorer rotating ass'y in an earlier un-damaged prepped block, topped with GT40P heads, 1.7 rocker arms and truck EFI intake. I have a good HO hyd. roller cam and lifters, odd bits and pieces and a set of 1999 XR8 headers to match the GTP heads I will modify to fit. This, combined with the AOD and looser converter should be nice and punchy off the line, with 60 odd extra HP over a stock truck 5.0L. This pile of bits will soon be a motor:
More updates soon.
I've been working on the F100 any chance I get, doing little jobs here and there. I had realised that I hadn't stoneguarded the bottom of the driver's door prior to paint, so I masked off the area needed and also did the fender bottoms, prepped the valance panel, front hood edge and the front and bottoms of the tub. 1 can of stoneguard JUST did the lot, and I allowed it to set for a day or two before sanding and prepping the driver door, valance, cowl and hood for colour. Saturday I threw on some colour and got these parts ready for install. I ran out of time to paint the centre of the hood in flat black, so I have to wait for good weather to finish that off. Since sunday it has been raining cats and dogs, so painting is out of the question. On the other hand, once the paint dried on the door, I started fitting the new seals, glass and winder to the driver door. All done:
- P1010411.JPG (89.25 KiB) Viewed 599 times
- P1010412.JPG (88.22 KiB) Viewed 599 times
- P1010413.JPG (75.94 KiB) Viewed 599 times
- P1010414.JPG (74.15 KiB) Viewed 599 times
- P1010416.JPG (77.11 KiB) Viewed 599 times
- P1010417.JPG (88.7 KiB) Viewed 599 times