As I alluded to in my recent posts, I've been behind in getting GFB updated (along with that
OTHER site...)...so here is a biggie:
I started a series of what I call "New Phase I" upgrades...enhancements to take my initial build to the next tier...upgrades designed to add some real functionality and features that will make my Bronco even more reliable off road. That, and fix/polish up some annoying things that have gone unresolved since I bought the Bronco in 2008....and started the build in the Spring of 2009.
So since I have a LOT more time to play with the Bronco (having left the world of IBM consulting and 'road warrior' status...), I've really gotten back into my ham radio hobby with a vengeance. So after essentially hanging up the radios for about 13+ years, I am now able to start using the Bronco again at local and regional sporting/social events where I can support activities with the Bronco and my radios. After all, I did build this as a 'rally support vehicle' after having done a ton of research in the late 90's with numerous visits to SoCal and AZ-based fab shops. So these New Phase I series of upgrades come at the right time for me to enhance the Bronco and really start enjoying it this summer...and well into the future!
New Phase I Upgrades - COMPLETED:
- Clocked Rear Axle & U-Joint Upgrads
- Big 5 Wiring Upgrade to 1/0 Cable & Grounds
- New Dual AGM Batteries
- New High Amp Alternator
- New HD Battery Mounts
- New HID Projector Headlights and New Rear Euro-Style Housings
- S-A-W 2.5" Res. Shock Rebuilds and Tuning
Details:
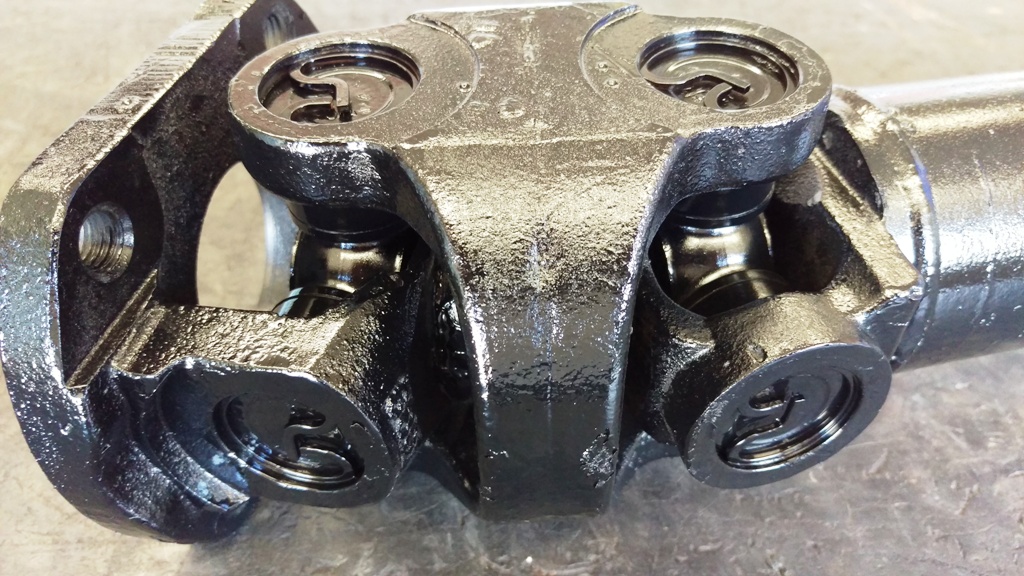
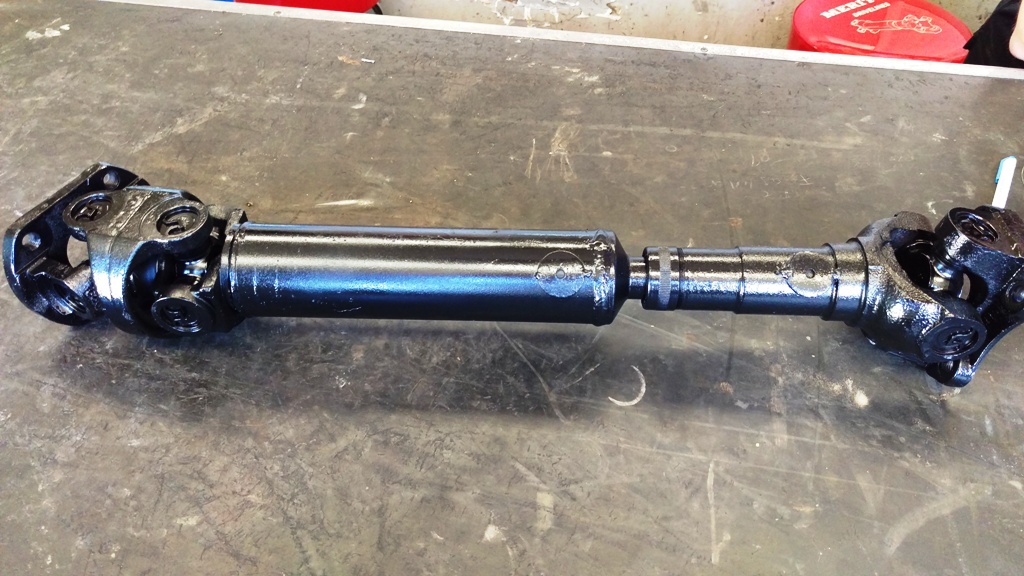
- Clocked Rear Axle & Spicer "Life Series" HD Lubed-for-life U-Joint Upgrade by GRS Drivelines: I cannot believe that I waited 8 years to get this fixed. As it turns out, my original fab shop installed my Autofab rear suspension with the 8.8 axle pinion in parallel with the output shaft of the transfer case. So from day 1, I've had this annoying vibration and sounds from my rear axle. When I took the Bronco to a local shop last August (GRS Drivelines, SLC UT) for some new greased-for-life Spicer U-joints, they said they'd only work on it after I had my rear axle properly clocked. It needed to be where the 8.8 pinion was in alignment with the incoming driveshaft (e.g., nearly zero deflection in the rear U-joint.) So I went back to my fabricator and he properly clocked the rear axle as desired (see picture). In doing so had to shorten the Autofab trailing arms wee bit. But when I drove away, all the noise and vibration vanished! Holy cow! I then took it over to GRS a week later and they installed the new Spicer "Life Series" 1350s in the double-cardan joint (along with a new centering kit), and a 1410 u-joint in the rear. Suh-weet! Talk about smooth and quiet performance? The trip to Boise and back last month was truly a pleasure with this new driveshaft!
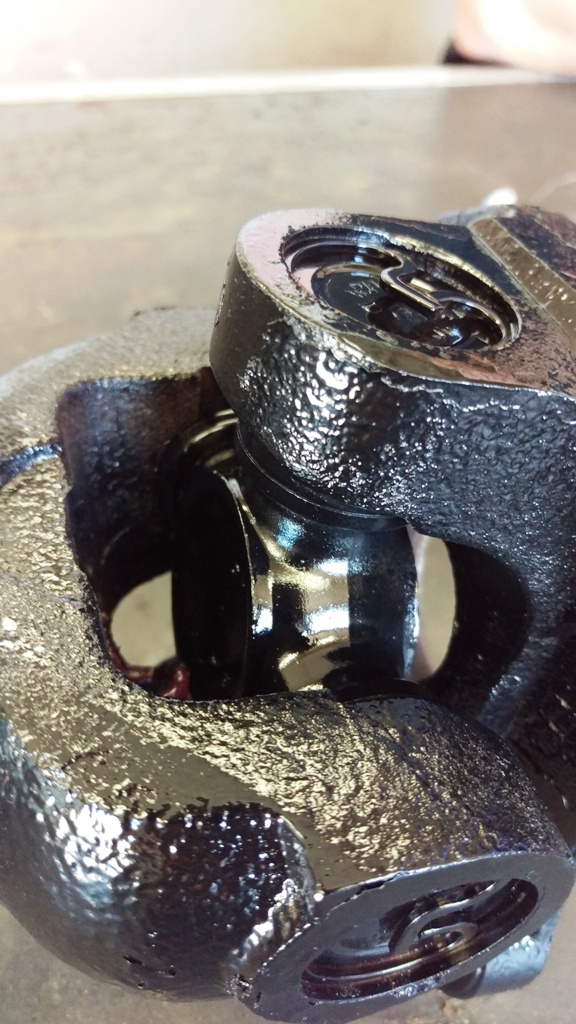
- GRS Driveline Upgrade - 1024x768 (4).jpg (236.82 KiB) Viewed 823 times
- GRS Driveline Upgrade - 1024x768 (3).jpg (279.94 KiB) Viewed 823 times
- GRS Driveline Upgrade - 1024x768 (2).jpg (247.19 KiB) Viewed 823 times
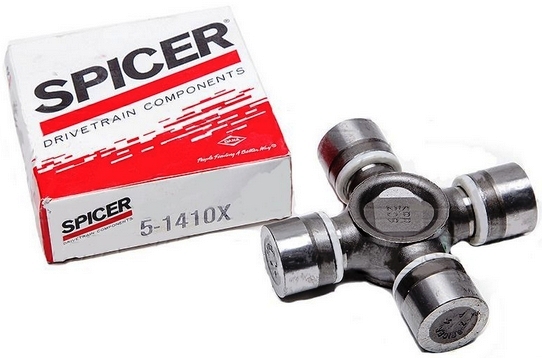
- Spicer Life Series 1410 U-Joint.jpg (111.89 KiB) Viewed 823 times
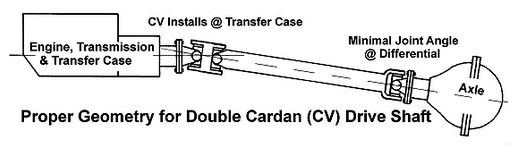
- Bronco Drive-shaft Alignment.jpg (45.69 KiB) Viewed 823 times
- Big 5 Wiring Upgrade to 1/0 Cable & Extra Ground Wires/Straps by Drive-In Audiosound (Utah): I started with the basic "Big 3" battery wiring upgrade to 1/0 cable, and made sure all the grounds were upgraded as well. My shop (Drive-In Audiosound, Sandy, UT) specializes in competition sound systems, and James knows his stuff when if comes to high-amp wiring (not to mention he is a licensed ham radio operator, too). So that wiring upgrade became the basis for all the rest of the stuff I have planned this summer. James also used military-style battery terminals on the Odyssey PC1750 (see below), and used soldered (and crimped) lug ends on all cables.
- New Dual AGM Batteries - One starting & one amateur radio deep-cycle high Ah rating: I purchased a new Odyssey #PC1750 (950 CCA Group 65 AGM starting battery) for the engine compartment, and a back-up Centennial #CB12-120S (118Ah deep-cycle AGM for the rear compartment) to power my two amateur radios (a Kenwood TM-V7A 2M/440 radio, and a Ranger RCI-2950 10M radio). The two radios will be wired directly to the Centennial battery using Anderson PowerPoles and red/black zip wire. James also installed a Stinger battery isolator as well.
- New High Amp Alternator - DC Power Engineering 270 XP (270 Amp 3G) https://www.dcpowerinc.com/7768-6k-270-xp.html: James works with DC Power Engineering for nearly all his competition audio systems (often times using dual and triple alternators!), so with my unique power demands (Hella 4000 and Hella 500 off-road lights, Massive #BX4 4x120W stereo amplifier, ham radios, 10M linear amp, future sub-woofer, etc...), 270 amps will be more than enough...and with 180 amps at hot idle (200F) , I should have no worries for any future upgrades.
- New HD Battery Mounts from Artec Industries: I've actually been driving around with a smaller Group 31 starting battery for years...as the Autofab shock hoops prevented the OEM Group 65 battery from fitting into the stock battery tray. D-oh! So I made sure that when I upgraded both batteries, that each would get it's own HD off-road battery tray/mount! I found Artec Industries (here in SLC) at the SLC Off-Road Expo 2016, and they make some nice mounts...so I went with them. James found a way to mount the PC1750 the same way the stock battery was mounted, so I didn't have to relocate the vacuum canister or anything else on the passenger side of the engine compartment.
- New HID Projector Headlights and New Rear Euro-Style Housings by HID Retrofit LLC: My old housings were cloudy and the left one's internal reflector was loose and rattling around inside...not to mention the water inside the housing. So I found HID Retrofit LLC here in SLC, and the proprietor built me some real nice clear housings with chrome reflectors (not that I need them), using some cool HID reflectors with hi/lo beam and halo rings. The halo rings also flash in amber when that side turn signal is on, but remains white otherwise. I first used these new lights at the Idaho Rally International last month in Boise, and wow, what a difference. There is a sharp cutoff on lo beam (they have to be raised again as they are just too low) as I find that I overdrive my lights on dark back roads. I also had him upgrade the rear lights to some new Euro-look clear lights that have a dark bezel. Really a nice improvement all the way around!
- S-A-W RaceRunner Shock Rebuilds and Tuning by Desert Speed Shock Tuning: Who knew that I had to rebuild my Sway-A-Way RaceRunner shocks! When I was getting my axle clocked (above), my fabricator found that my left front forward shock was leaking at the lower seal, and suggested that I should get them rebuilt. After a little online research, I found Desert Speed Shock Tuning here in Utah, and set-up a rebuilding and tuning session with Matt in late June. A few weeks ago Matt took my Bronco on a trailer and hauled it off to his shop, and then started rebuilding all six shocks. Last Friday, he brought the Bronco out to the desert (on the old Pony Express Trail in fact), and I took the Bronco for some warm up runs. After some slight warmup (and a check that all six were actually warming up and not getting hot,) we went for a more aggressive/higher-speed run...and videoed some runs using his GoPro. Again, with just the rebuild and some guess-work on Matt's behalf, it was a night and day difference from the rock hard ride I've had for the last 8 years. So this was the first tuning evolution, as Matt took the video back (along with my feedback) and is planning the second tuning session for 28 July...where he will tear apart all six shocks (again, this time in the field), and soften them up even further (focusing on mid-stroke compliance.)
Note: I once attempted to get some shock tuning ideas from John Ehmke (owner of Autofab) back in 2014, but he literally said nothing and just referred me to Sway-A-Way.

So on a business trip to SoCal later that year, I visited S-A-W in Chatsworth...and actually spoke to their President. However, he referred me back to John...and was hinting that the spring rates were probably way too high. Oi!

I wasn't about to start a pissing contest between the two, so I gave up...
until now. So if you have special emulsion, reservoir, or by-pass shocks on your Bronco, do yourself a HUUUGE favor and get them rebuilt and tuned to the type of driving you want! Shocks are such a huge investment...and your shocks should be working for YOU!
The photos are embedded below (and on subsequent posts) for your viewing pleasure.
Next: Planned Phase II Upgrades:
- Custom Center Console for Ham Radios/Accessory Switches/New Glow-Shift Gauges/Cup Holders
- Subwoofer with Dedicated Amplifier
- New Grill and Headlight Surrounds (already purchased...just need to paint and install!)
- Ford XLT Gauges with Tachometer Install (I've only had the gauge for 2 years now...just haven't installed it yet!)
- Saginaw P/S Pump Upgrade (Again, I've only had the pump/bracket from an E-150 for 3 years now...Ugh!)
Future: Planned Phase III Upgrades:
- Custom built 331 Stroker Motor
- Custom built E4OD Transmission
- Supplementary Cooling for Transmission & Engine
- New 2-row Radiator and Continental 'Elite' Radiator Hoses
- HD F-250 Tie-rods
...more pictured to follow...