Page 3 of 4
Re: 2000 Mercury Mountaineer Build
Posted: Wed Dec 14, 2016 9:08 am
by ChaseTruck754
looking good!
2000 Mercury Mountaineer Build
Posted: Thu Dec 15, 2016 8:03 am
by cs_drums
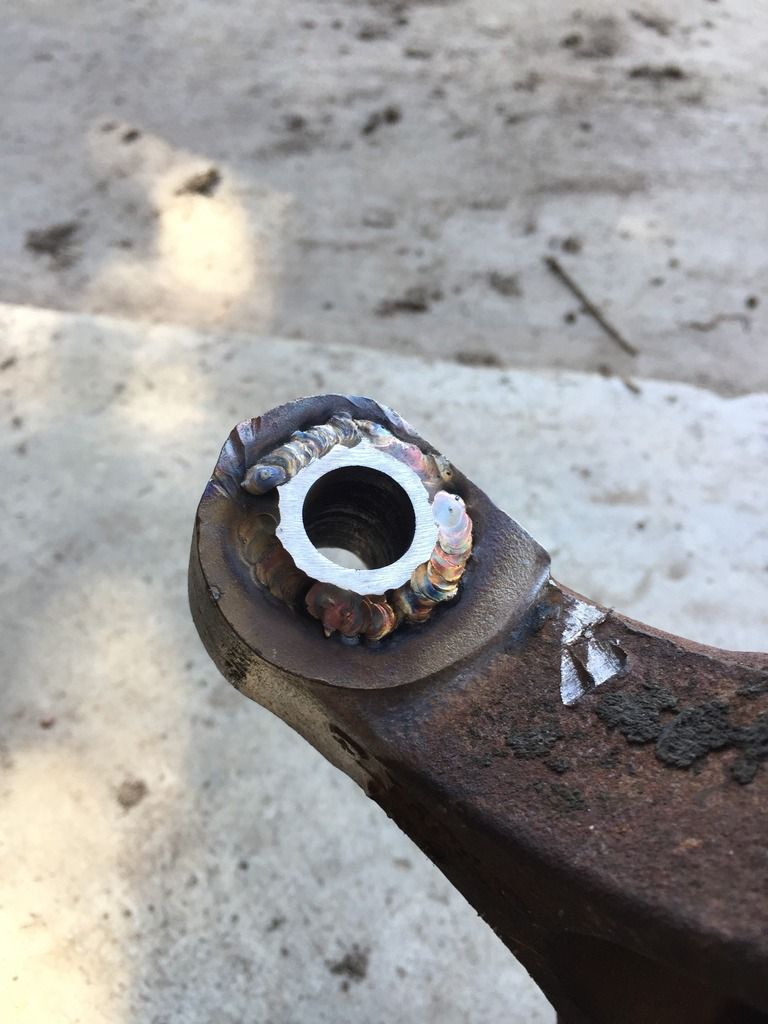
[quote="mounty71"]This past weekend I took apart the steering box to drill and tap it for hydro-assist and to reseal it. I simply plugged the ports for now and will deal with the hydro-assist.
[\quote]
Do you have more info on this? I'd love to save some $$ and do it myself as well. Any pics or other threads etc. would be great!
Sent from my iPhone using Tapatalk
2000 Mercury Mountaineer Build
Posted: Thu Dec 15, 2016 1:53 pm
by mounty71
http://4x4.forensick.net/88bronco/images/sbr/index.htm
This is the write-up I followed for the teardown and rebuild, but since it only covers the rebuild and not hydro-assist, I just drilled and tapped once it was all apart. I just google searched pictures of where people put the ports and chose the two spots I liked the best and went for it. Hoping I got it right! Ill get a picture of where I put them this weekend. I used 1/4-18 pipe thread. I wasn't able to get the nut with the 4 notches off so there were a couple of seals I couldn't replace so I'm hoping those weren't the ones leaking.
Sent from my iPhone using Tapatalk
2000 Mercury Mountaineer Build
Posted: Thu Dec 15, 2016 1:56 pm
by mounty71
I did it myself because I also wanted to save some money on a professionally rebuilt and tapped box, but if I can't get this one to stay leak-free once I get the truck up and running, I'll just go that route instead. The whole process took me way longer than I expected it to, I spent the better part of a day on it and don't feel like trying again.
Sent from my iPhone using Tapatalk
Re: 2000 Mercury Mountaineer Build
Posted: Mon Jan 16, 2017 8:19 pm
by mounty71
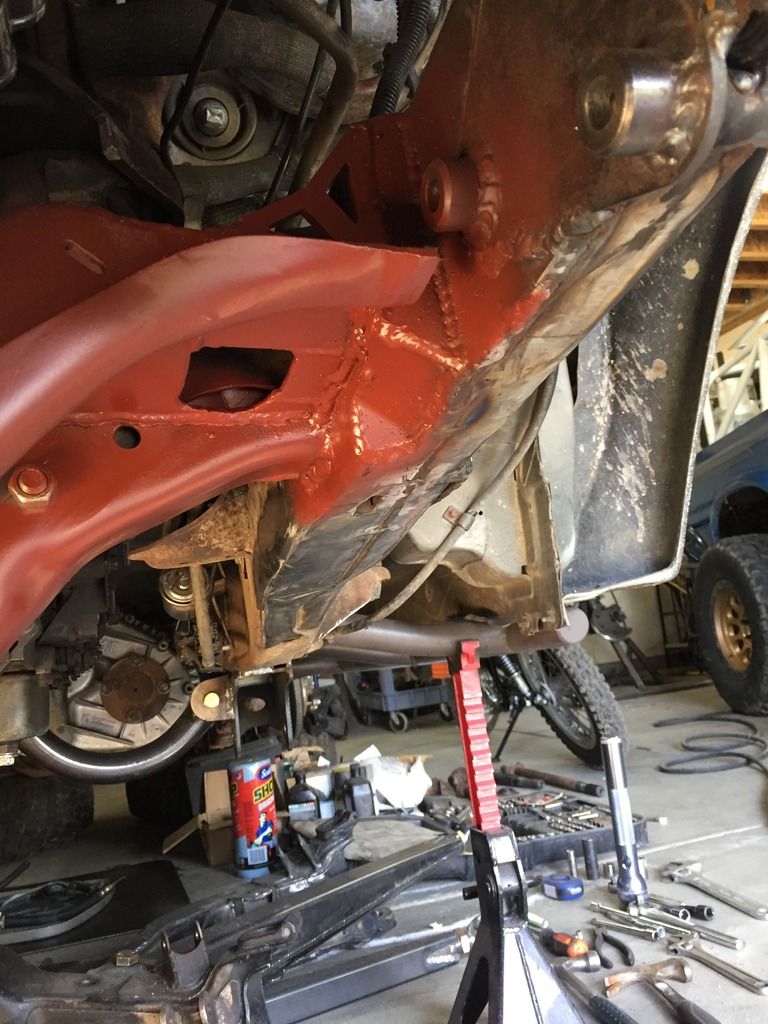
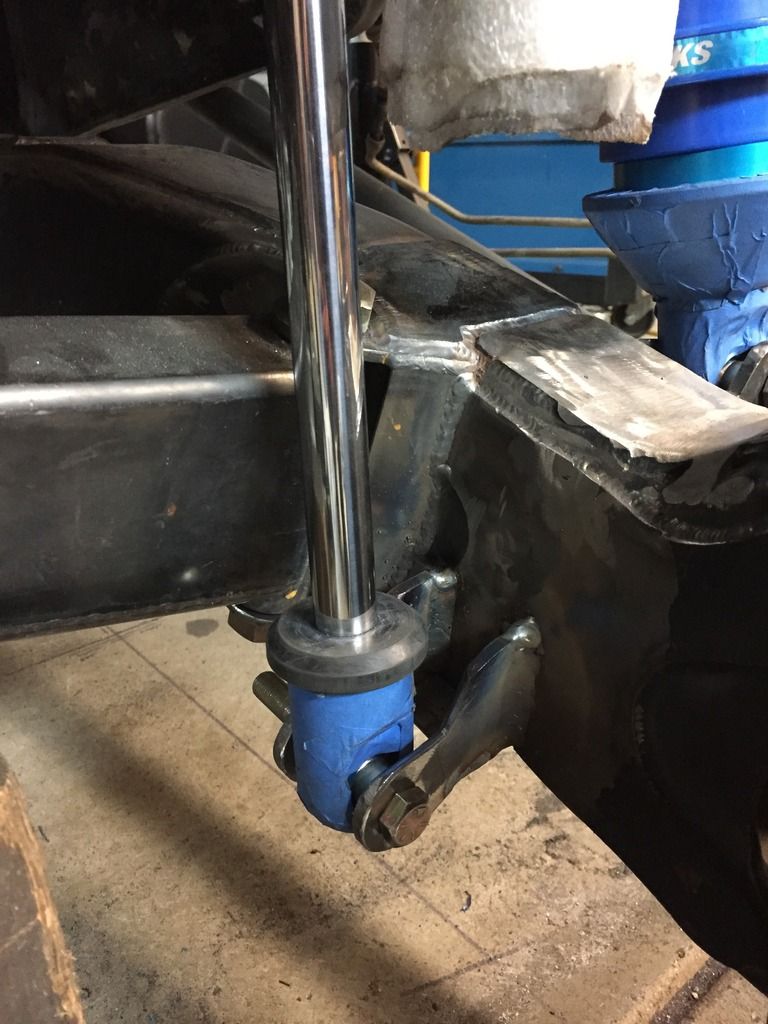
Not sure how many people follow these non-Bronco builds but what the hell...
After a lot of test-fitting this what I ended up with remaining from the original TTB crossmember. Looking back now I could probably have saved a little more of it.
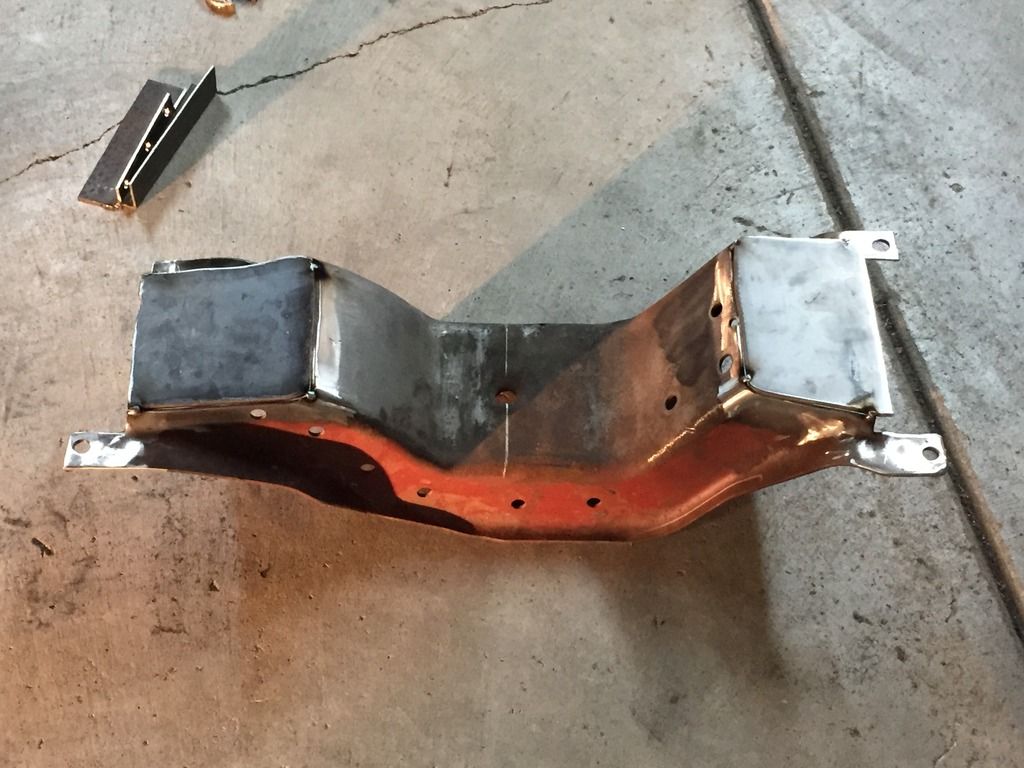
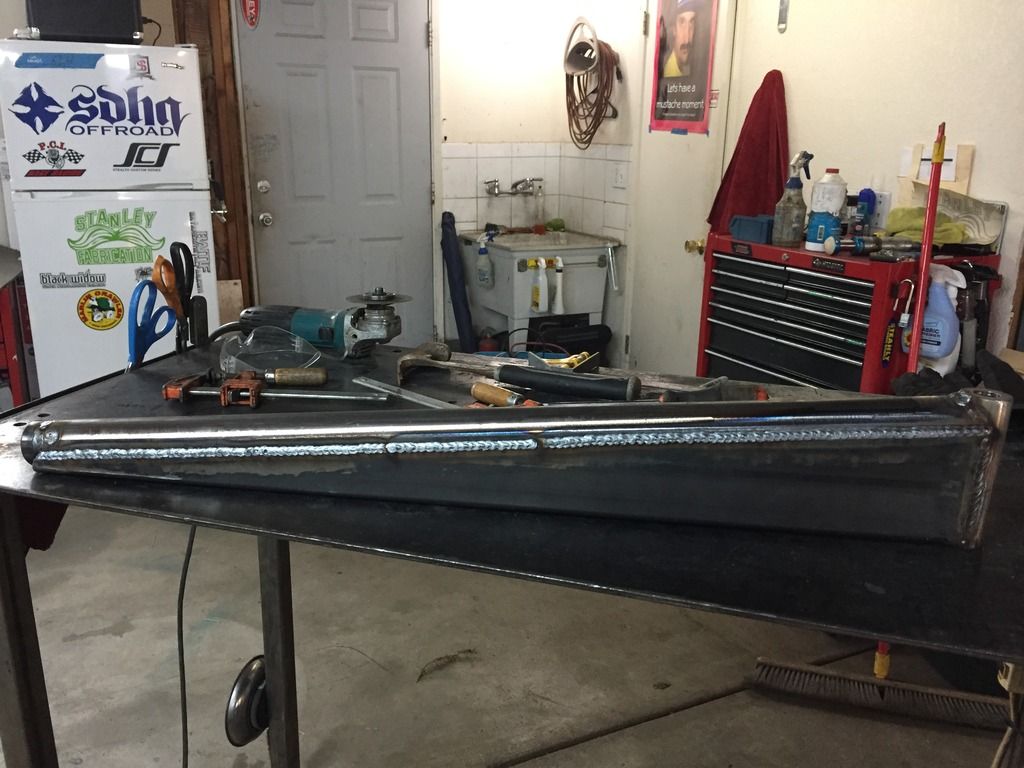
I have the radius arms built and did a bunch of plating on the beams, in addition to welding in the uniballs.

Crossmember is fully welded in now too and the steering box has a perfect amount of clearance over that gusset luckily.
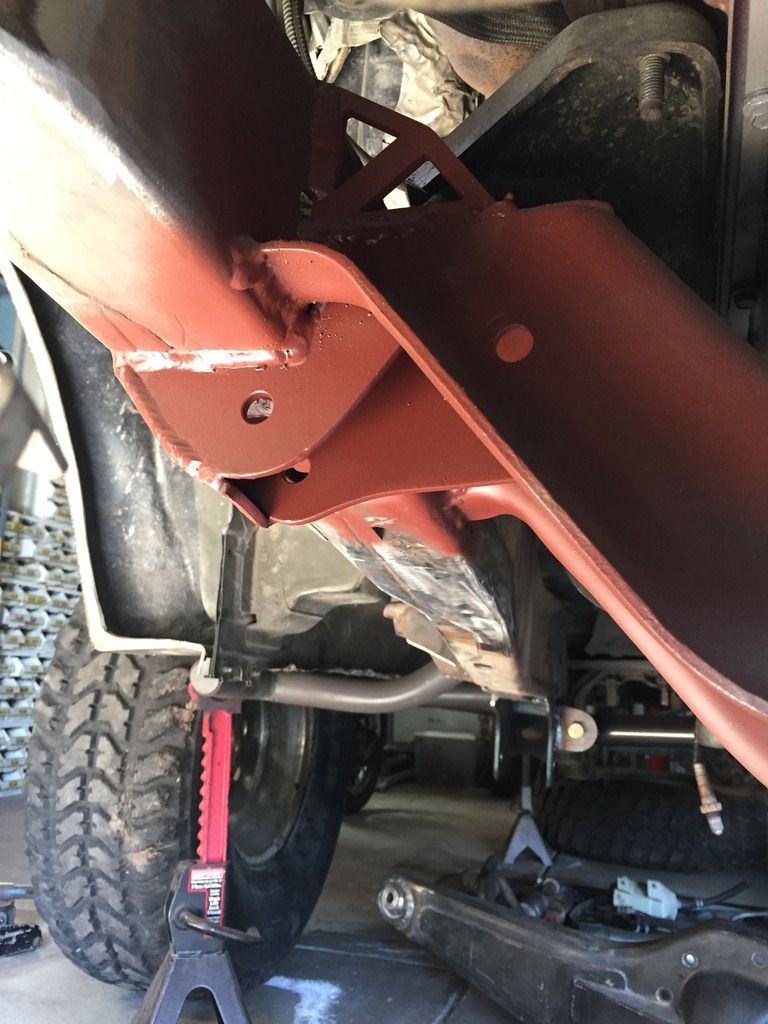

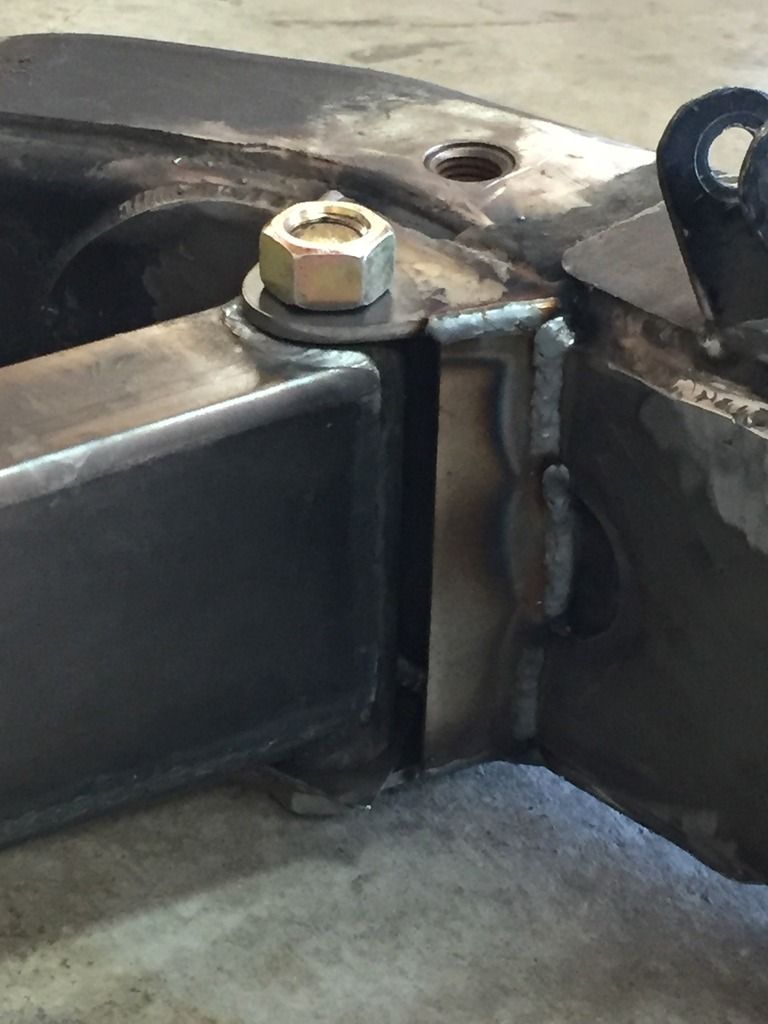
Gusseted the driver's beam mount
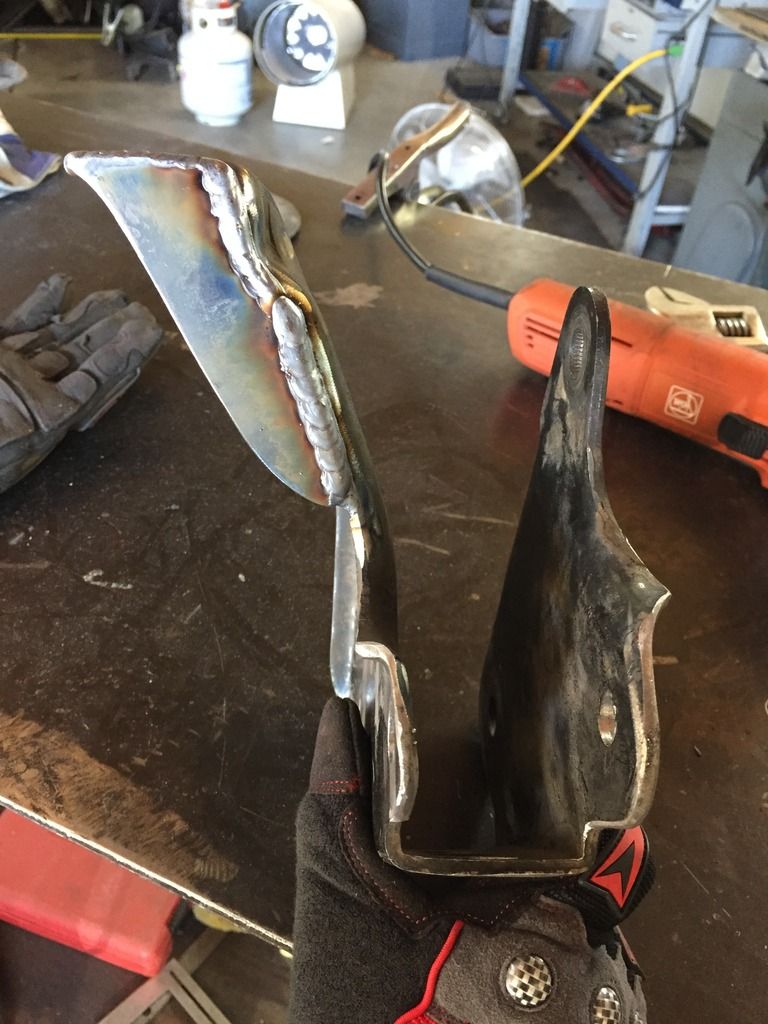
Drilled out the spindle steering arm taper and TIG welded some sleeves into the steering arms to be through-bolted
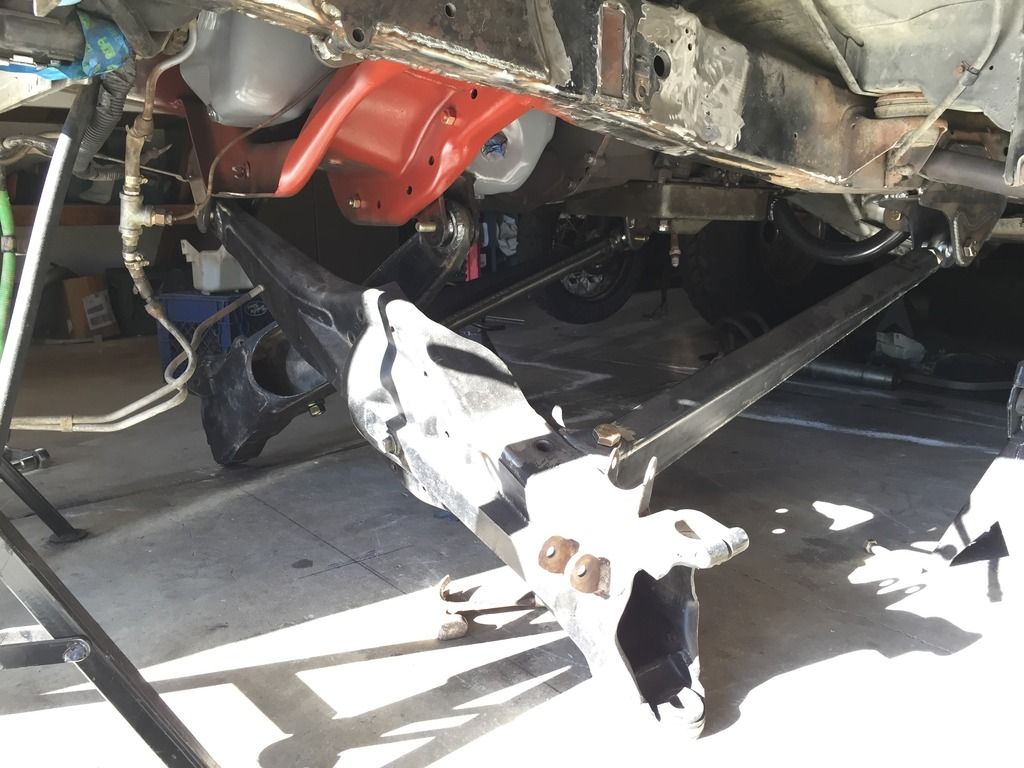
Beams and radius arms hung
Cut out the shock hoops and put a coilover in position. I'm guessing this will be about where the coilovers will be at droop. I need to mount a tire and bump out both sides equally and then compress the shocks to actually know where full bump will be, and built shock hoops and steering from there.
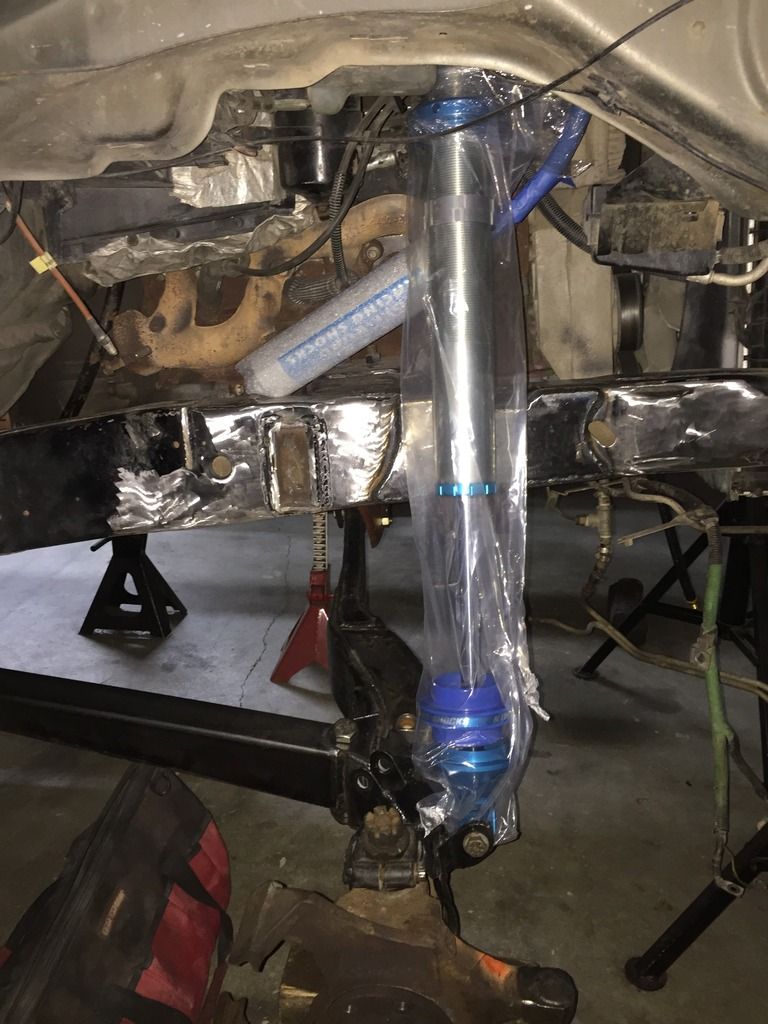
Decided to switch to King everything so I got some new 2.5x12" coilovers from Downsouth Motorsports for a great price. I think I'm just going to go for the secondary shock up front now too. I'll keep the 12" Swayaways in the back for now but my plan is to do a cantilever setup in the future. I feel like there is so much more that I've done but that's the gist of it.
2000 Mercury Mountaineer Build
Posted: Mon Jan 16, 2017 9:07 pm
by cs_drums
This thread is killer. My buddy is swapping TTB on his T100 soon and this will be a good Terence for him.
Sent from my iPhone using Tapatalk
Re: 2000 Mercury Mountaineer Build
Posted: Mon Jan 16, 2017 10:16 pm
by ChaseTruck754
I'm loving the thread as well. All is looking good!
I want to drop TTB in a F-100 at some point & I've looked at taking the stock cross member like you have here. What did you use for tube on the radius arms?
Re: 2000 Mercury Mountaineer Build
Posted: Mon Jan 16, 2017 10:43 pm
by mounty71
Glad you guys are enjoying it. Seems like it's becoming pretty popular to swap TTB under different vehicles these days, although most go for the D44 beams.
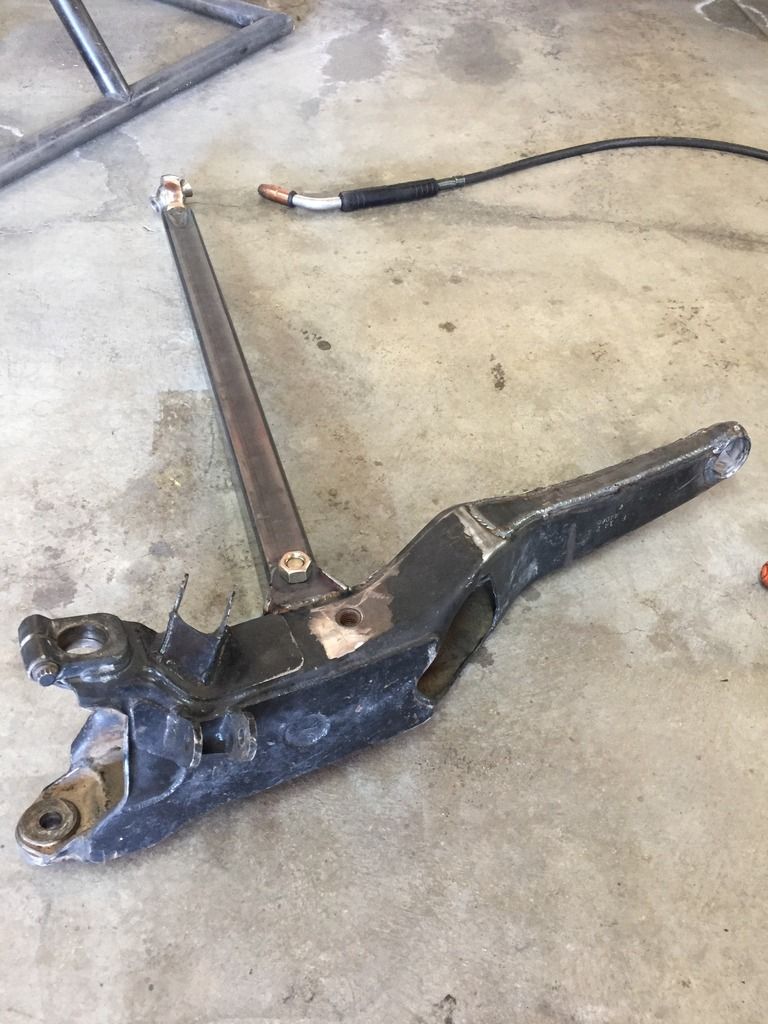
And on the radius arms the round bottom tube is 1.75"x.120", and the rectangular tube is 2"x5"x3/16". For the vertical tube that the bolt goes through, that's 1.5"x.120" sleeved over 1.25"x.25" if I remember correctly, to get the proper I.D. for a 3/4" bolt.
Re: 2000 Mercury Mountaineer Build
Posted: Mon Jan 16, 2017 10:49 pm
by mounty71
Here's a better picture showing how I did the radius arm (upside down).
Re: 2000 Mercury Mountaineer Build
Posted: Tue Jan 17, 2017 1:02 am
by ChaseTruck754
Those look stout. Pretty similar to my plan for what I'd like to do.
Re: 2000 Mercury Mountaineer Build
Posted: Thu Jan 19, 2017 7:43 am
by Pickuptrucker
Cool thread, very creative build
Re: 2000 Mercury Mountaineer Build
Posted: Sun Jan 29, 2017 11:01 pm
by mounty71
2000 Mercury Mountaineer Build
Posted: Thu Feb 02, 2017 11:37 pm
by mounty71
2000 Mercury Mountaineer Build
Posted: Tue Feb 21, 2017 10:49 pm
by mounty71
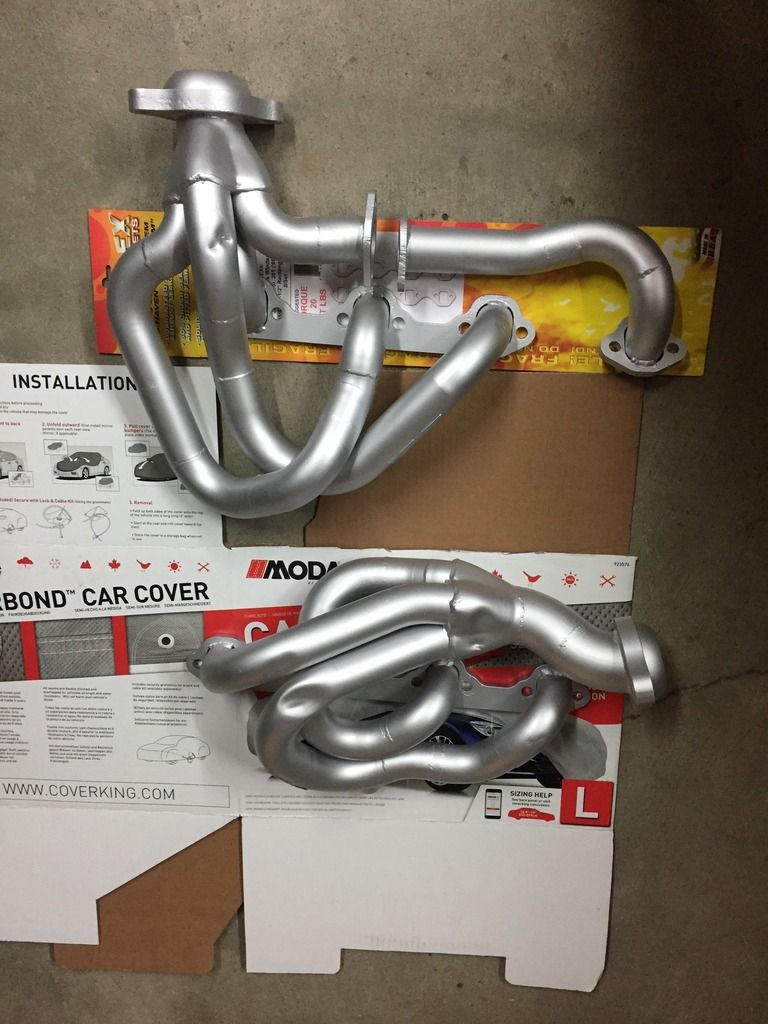
Ceramic coated my old headers and installed them again, hoping to have better luck with them and the heat they put off.
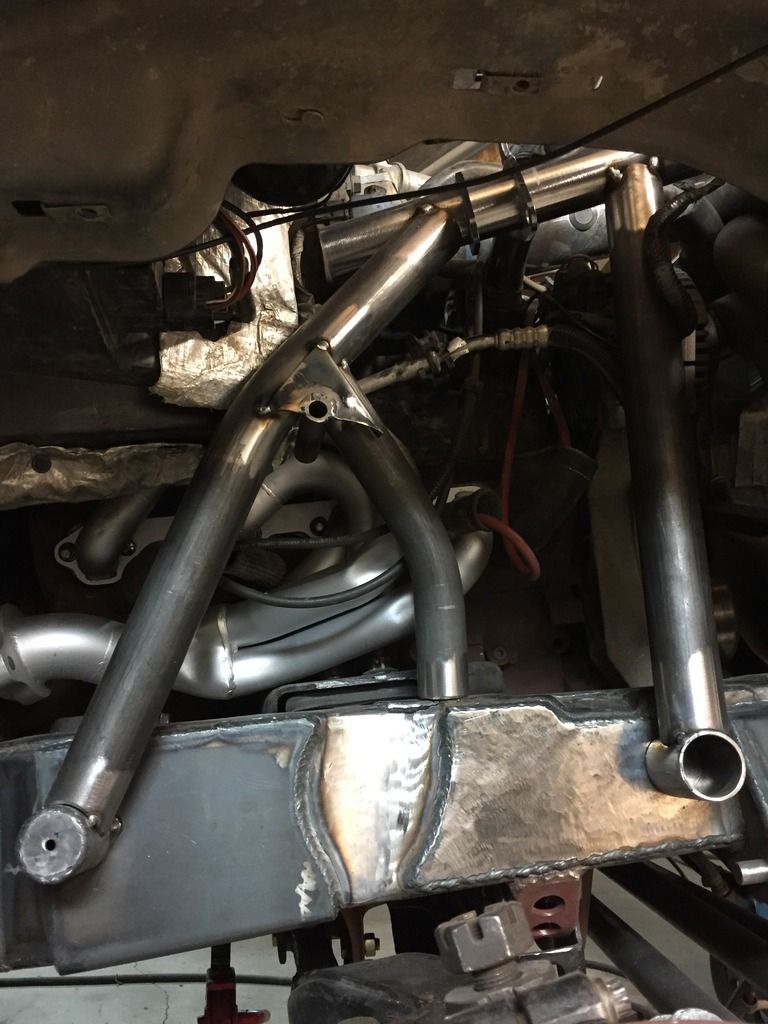
I have shock hoops 95% completed and am working on the cross brace over the engine now.
Waiting on my second pair of shocks so I used both coilovers to build off of.
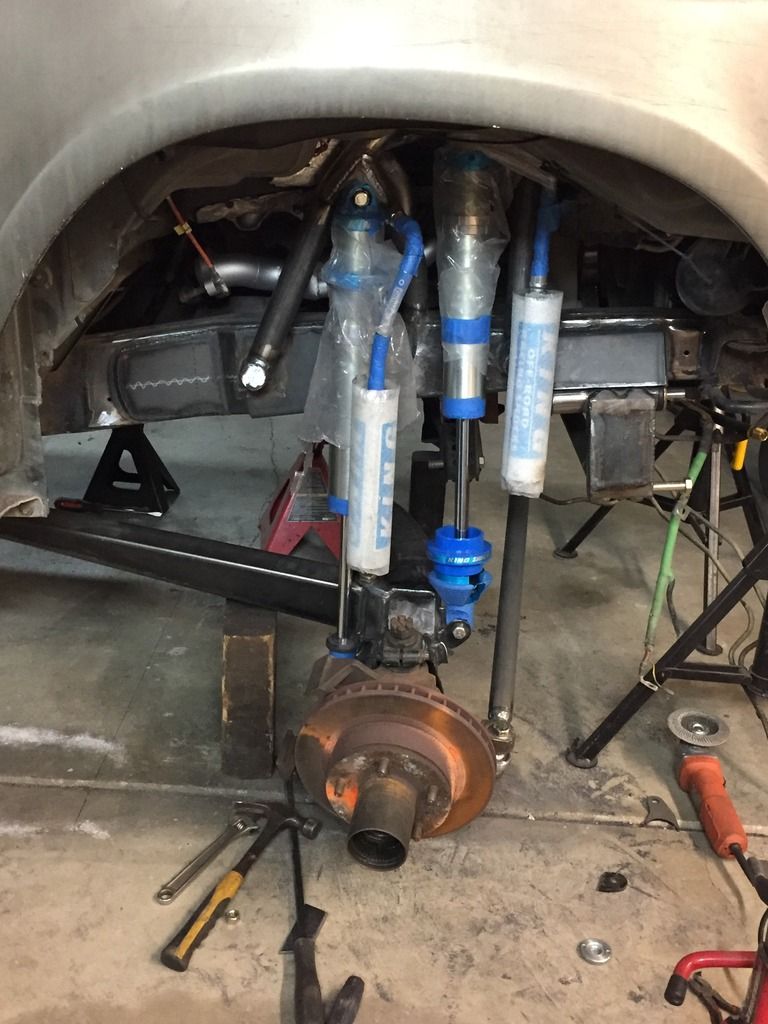
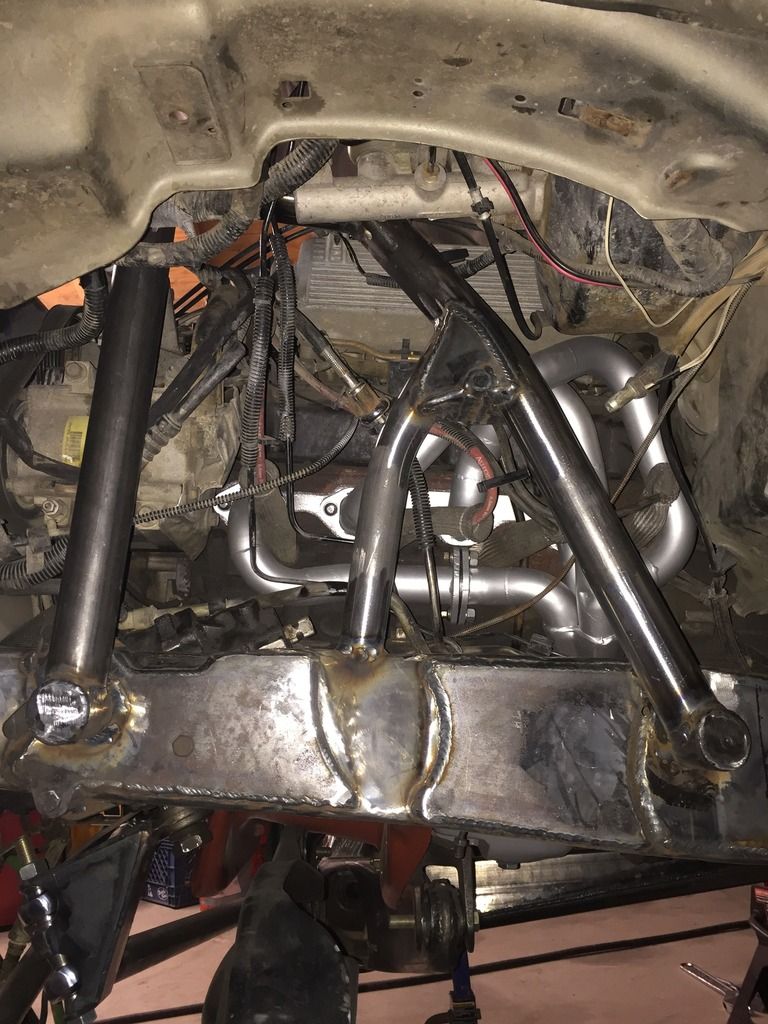
Trying something a little different for the cross brace.
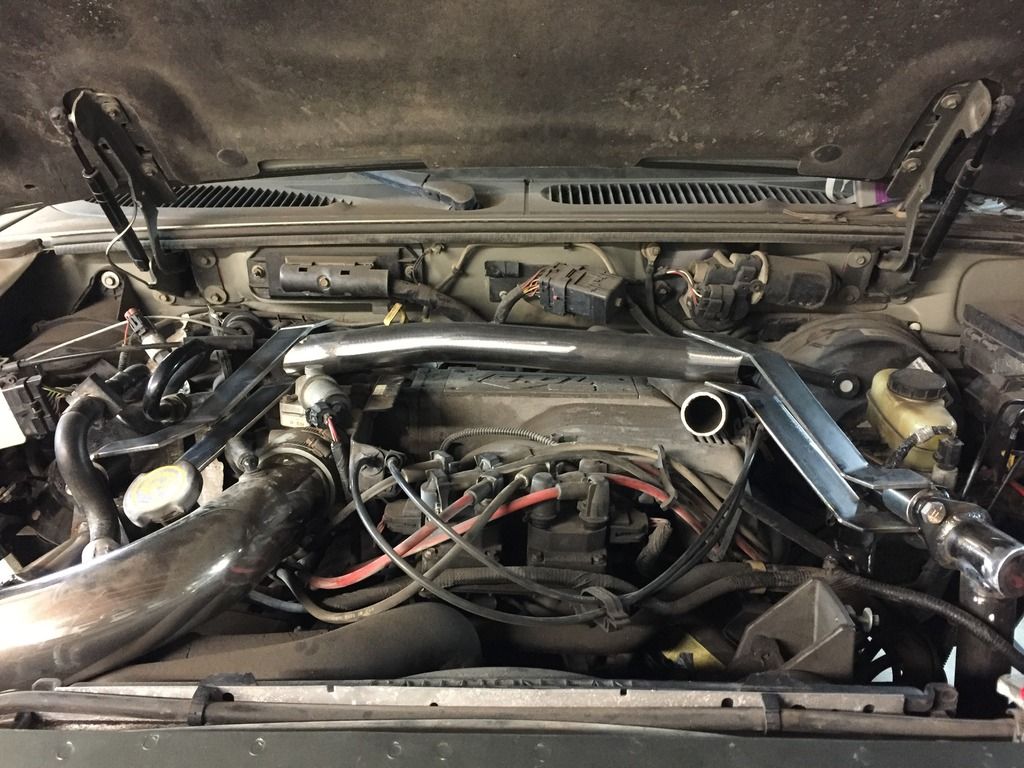
Not totally sure I like it as much as I thought I would but we'll see how it turns out.
Sent from my iPhone using Tapatalk
Re: 2000 Mercury Mountaineer Build
Posted: Wed Feb 22, 2017 11:04 am
by ChaseTruck754
Did you ceramic coat the headers yourself or send them out somewhere? If you did it yourself - what did you use?
2000 Mercury Mountaineer Build
Posted: Wed Feb 22, 2017 12:00 pm
by mounty71
No I just brought them to a local place.
Sent from my iPhone using Tapatalk
Re: 2000 Mercury Mountaineer Build
Posted: Sun Mar 19, 2017 12:06 am
by mounty71
Re: 2000 Mercury Mountaineer Build
Posted: Thu Mar 23, 2017 7:46 pm
by otter
Kick ass job, Matt. She looks good.
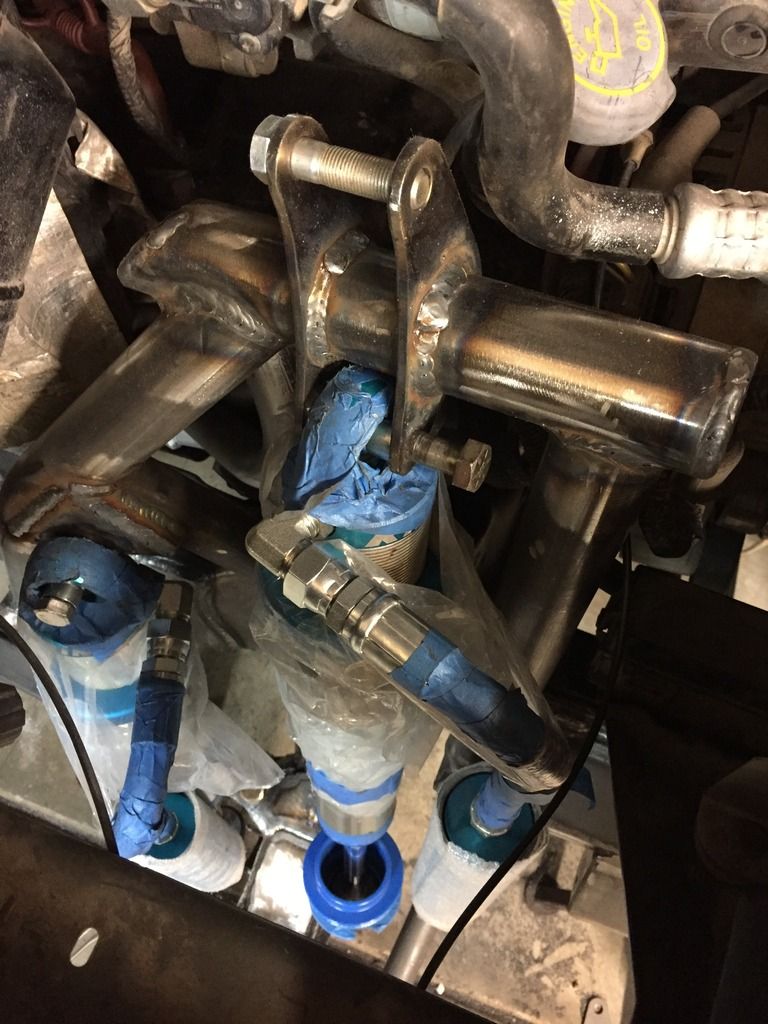
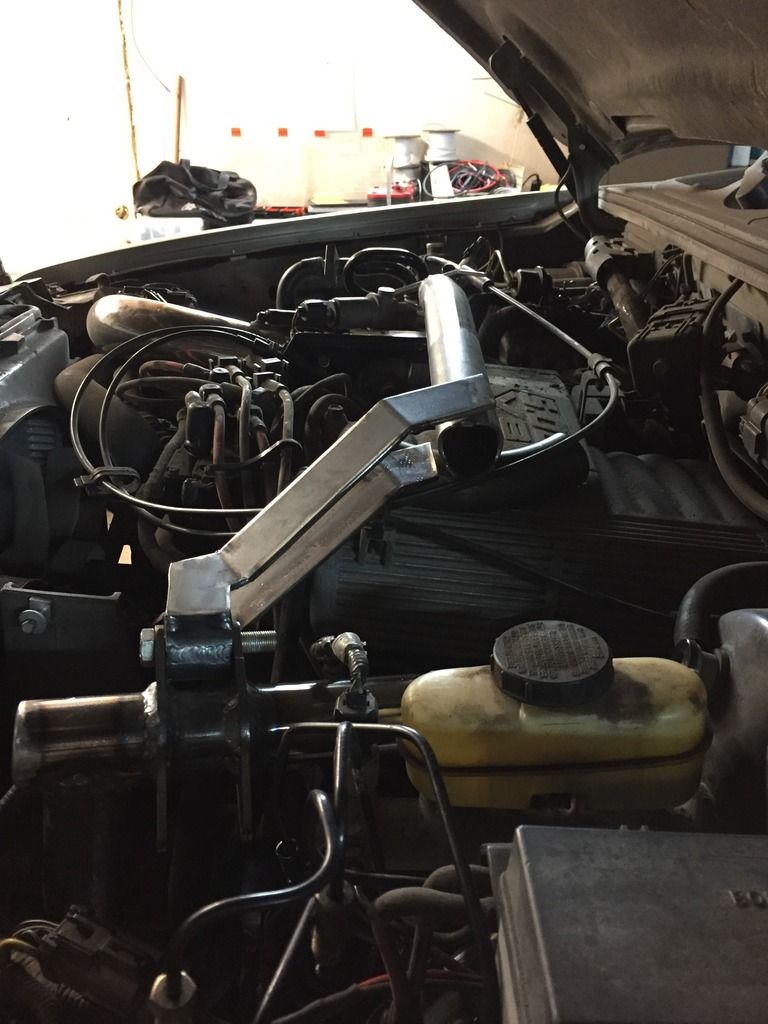
2000 Mercury Mountaineer Build
Posted: Sun Mar 26, 2017 11:10 am
by mounty71
Thanks Pat. Got my second pair of shocks finally, began mounting the steering ram and got all the hydraulic lines figured out. I'm using a Tractor Supply 8" that's been shortened to I think about 6" stroke. It's a freebie from a friend, and another friend has the same ram on his TTB front end and it seems to work well enough.


Sent from my iPhone using Tapatalk
2000 Mercury Mountaineer Build
Posted: Fri Sep 22, 2017 2:55 pm
by mounty71


