Thursday, I fitted new inserts to the wiper arms, splashed on some satin black and fitted them up. I also picked up an air filter for the propane mixer. I need an air filter on this new engine, so it doesn't get ruined (although I think the rings were scuffed when the heater let go and overheated it during cam run-in). No sense being lazy and ruining a rebuild. I WAS going to drive it to work Friday, but at breakfast, I heard rain hit the tin roof for about 5 mins, and it was very dark to the north, so I left it at home. Sure enough, half way to work, the heavens opened and it PISSED DOWN! Like, "full speed wipers just to see where I was going" rain. Anyway, once I got home from work, I dragged out the propane tank, the mounts and a few other things to get ready to fit it up today.
So, after the Handbrake left for work, I lifted the tank with the engine crane, dropped it into the tub, positioned it and dropped in the bolts. Once they were done up, I connected the supply hose and wiring and tied everything up with zip ties. Once I connected the mixer to the convertor, I started trying to get it to run on propane. NO GO.
After checking everything I could think of, I dis-connected the tank hose and quickly bumped the key, only to get vapour at low pressure. Hmmmmm, no propane. I was sure this thing was part full when it came out. Anyway, I had another tank (out of Mike's Falcon) with gas still in it, so that got jury-rigged up and I had liquid to the lock off valve, but no propane at the convertor. Aftre testing and replacing the lock valve, I still had nothing, so I'll have to assume that the convertor is R.S. I also flattened the battery trying to get it to start/run.
While I was looking for other parts to try and fix the propane system, I stumbled across the 80A alternator I'd had built 15 or so years ago, and after comparing the two, I removed the non-working one, stripped them both down and made one from the two. I actually could have just put in a new regulator and made the old one go, but I wanted the higher charging rate. The conversion required the front housing from the old alternator to be retrofitted to the new assembly, which was accomplished with minimal fuss. Once bolted on, now the volt gauge shoots to 13 1/2 volts.
A quick check over done I went for a short drive, only to find out the secondaries in the new carb will not meter fuel. Wnen I open the throttle hard, it just flat spots badly. It does the same even when I try feeding the secondaries in gently. I've checked EVERYTHING I can think of, without taking it apart, so I've sent an email to the company I bought it off, and am waiting for a reply. I don't wan't to take it apart yet, don't want to ruin any warranty.
Other than that, it drives good. I will have to re-gear the diffs, too, to make it cruise at 2000 rpm or so @ 70 mph. Its only doing barely 1600 with the 3.7 and 33 inch tyres. The math says 4.56 gears will give me 2100 @ 70 mph in O/D, so that might work. I might have a 4.09 TTB pumpkin lined up I can re-gear for the front, and I already have brand new 4.56's for the 9inch, just need a Detroit or TruTrac to make up the spare pumpkin. I'll get the carb sorted and the propane working first, get the trans going properly, then look at the gearing.
Pics:
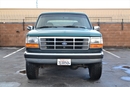
Wipers fitted:
- P1010042.JPG (84.93 KiB) Viewed 4837 times
- P1010045.JPG (87.93 KiB) Viewed 4837 times
- P1010044.JPG (89.63 KiB) Viewed 4837 times
- P1010040.JPG (75.12 KiB) Viewed 4837 times
More later.